21.10.2025
You might own the best espresso machine. However, without the right tools, creating that silky microfoam feels impossible. This is where a small, often forgotten hero of the coffee world comes in. So, what is a milk frothing pitcher?
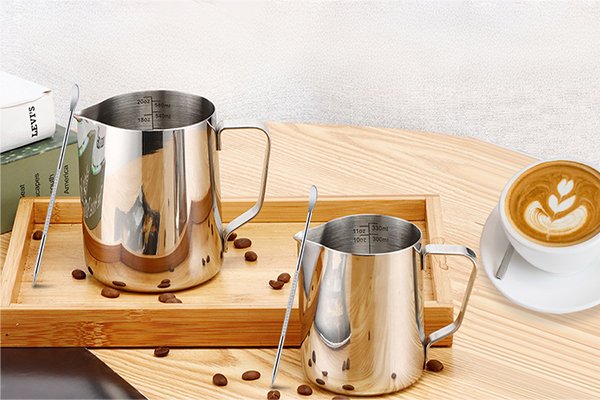
Simply put, a milk frothing pitcher is a specially designed container. It’s also called a milk jug or steaming pitcher. You use it to hold milk while steaming and frothing it with an espresso machine’s steam wand.
It’s much more than just a metal cup. Its specific design is crucial for creating the ideal milk texture for specialty coffee drinks.
This guide helps everyone. Whether you’re a curious beginner starting your coffee journey or a home barista wanting to perfect your craft, we’ll explain everything. We will demystify the milk frother pitcher, exploring its parts, how to choose the right one, and step-by-step instructions to transform cold milk into liquid velvet.
Table of Contents
An Essential Tool
Temperature Control
Facilitating the Vortex
Volume for Expansion
Precision for Pouring
- Latte: Requires silky, integrated microfoam with a thin layer on top.
- Cappuccino: Traditionally has a thicker, more distinct layer of airy foam.
- Flat White: Demands a very thin, velvety layer of microfoam blended seamlessly with the milk.
Anatomy of the Pitcher
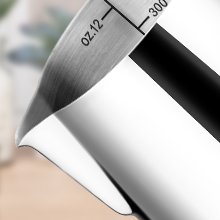
The Spout
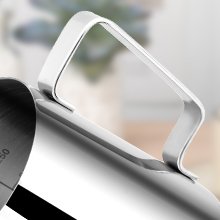
The Handle
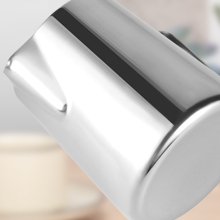
The Body and Base
The Material
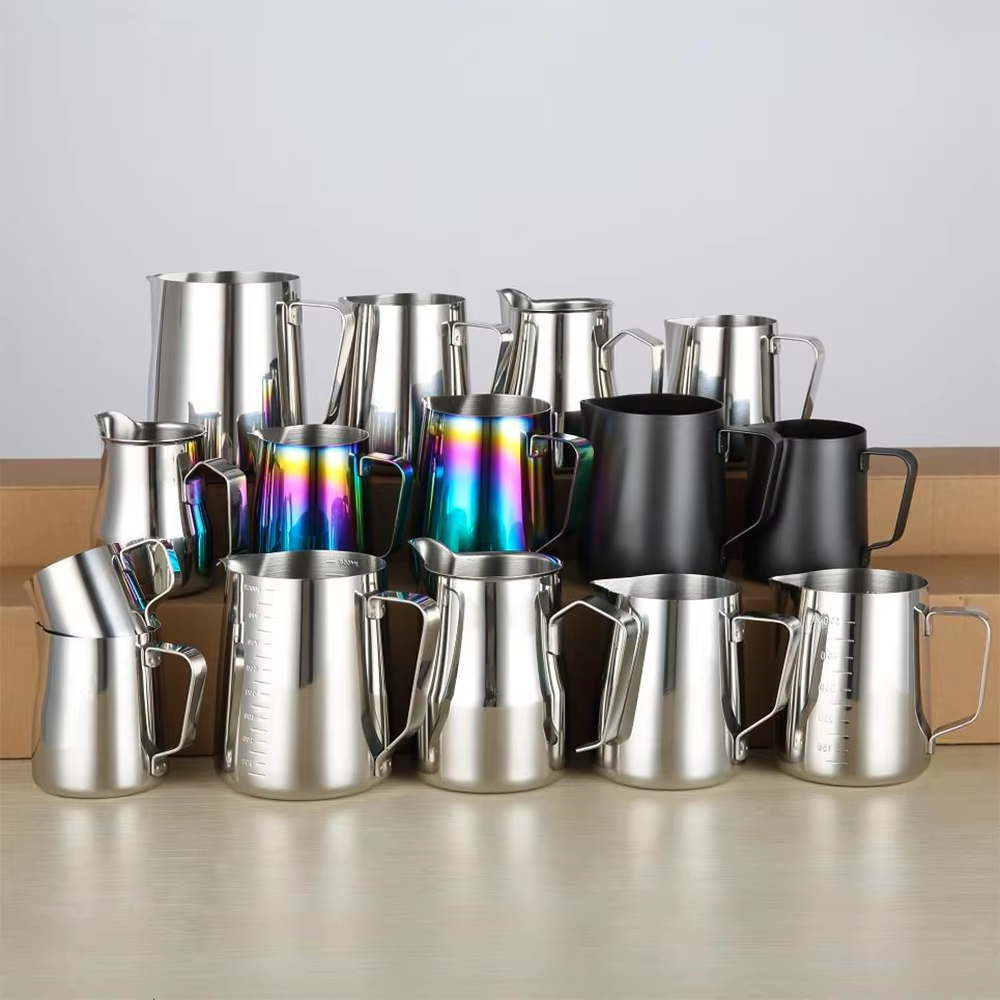
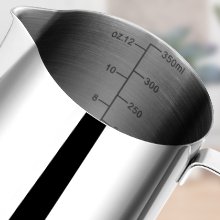
Volume Markings
Choosing Your First Pitcher
1. Material Deep Dive
Stainless Steel | Excellent heat feedback, durable, affordable, easy to clean. | Plain appearance (for some). | Everyone. The industry standard for a reason. |
Teflon (Non-Stick) Coated | Extremely easy to clean; milk residue slides right off. | Coating can scratch or wear off over time; harder to feel temperature. | Baristas in high-volume settings or home users who prioritize quick cleanup. |
Titanium / Colored | Aesthetically pleasing; available in many colors. | More expensive; color can fade or scratch; often just a coating over steel. | Users who value aesthetics and want to personalize their coffee station. |
2. Why Size Matters
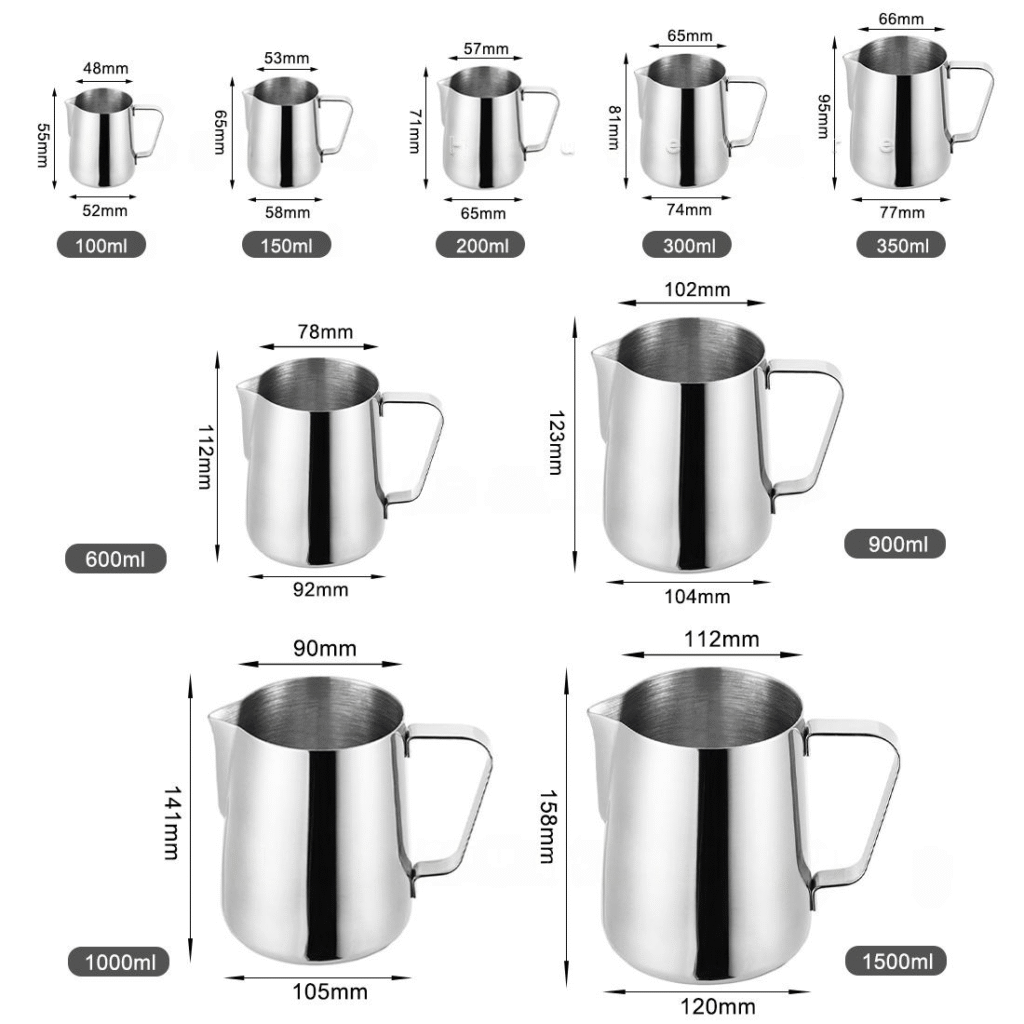
- 12 oz / 350 ml: This is perfect for a single small-to-medium drink, like a single 6-8 oz cappuccino or flat white. It’s the most common and versatile size for home use.
- 20 oz / 600 ml: This size is ideal if you regularly make two drinks at once or prefer large lattes (12 oz or more). It offers more room to work with, which some beginners find easier for controlling the vortex.
- 32 oz / 1000 ml and up: These are generally reserved for high-volume commercial café use. They are too large to effectively froth the small quantities of milk needed for one or two drinks at home.
Spout Shape and Ambition
From Cold to Silky
Step 1: The Preparation
Step 2: The Stretch
Step 3: The Swirl
Step 4: The Finish
Pro Tips and Mistakes
Pro Tips for Learning
Troubleshooting Your Foam
Problem | Likely Cause(s) | Solution |
Big, Soapy Bubbles | You introduced too much air (“stretching” for too long) or didn’t create a proper vortex. | Stretch for a shorter period. Focus on submerging the wand deeper after the initial stretch and creating a strong, swirling vortex for the majority of the heating time. |
Milk is Screaming/Shrieking | The steam wand is too deep in the milk from the start, essentially just boiling it. | Keep the wand tip just below the surface during the initial “stretching” phase until you hear that gentle hissing sound. |
Foam is Thin and Watery | You didn’t introduce enough air, or you overheated the milk, causing the proteins to denature. | Keep the wand tip closer to the surface for a bit longer to introduce more air. Stop steaming as soon as the pitcher is too hot to hold. |
Foam Separates Quickly | This is natural, but it’s exacerbated by under-textured milk or letting it sit. | Keep swirling the milk in the pitcher right up until the moment you pour. This keeps the microfoam and liquid milk fully integrated. |