
21.10.2025
Making a creamy latte from a simple espresso shot is an art form. The milk frothing pitcher is your most important tool for this transformation.
Many home coffee lovers find this process scary. How do you create that smooth, glossy texture instead of a bubbly disaster? You’re in the right place.
This guide will teach you how to use a milk frothing pitcher effectively. We’ll take you from complete beginner to confident home barista.
We’ll explain the process clearly and break down the science behind it. Our goal is helping you make café-quality microfoam every time. Whether you want the perfect morning latte or you’re trying latte art for the first time, mastering the milk pitcher frother is essential.
Table of Contents
Understanding The Tool
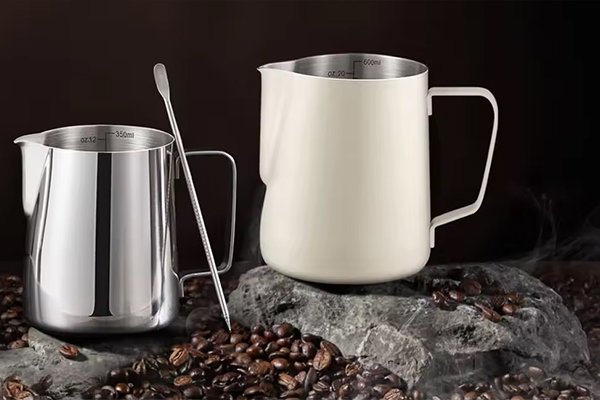
Let’s start with the basics. A milk frothing pitcher is more than just a small metal jug. People also call it a steaming pitcher or barista pitcher.
Its design has one specific purpose: helping you create perfectly textured milk. Every curve and angle matters. Even the material plays a role in your final result.
Key Pitcher Features
A quality pitcher is worth the investment. Understanding its features helps you use it properly.
- Material (Stainless Steel): Most pitchers use stainless steel. This isn’t just about looks or durability. Steel conducts heat excellently. This means you can feel the milk’s temperature through the pitcher with your hand as it heats up. This feedback is crucial for preventing burnt milk and hitting the perfect temperature.
- The Spout: The spout’s shape is critical, especially for latte art. It controls your flow and precision when pouring.
- Classic Spout: A narrow, defined spout gives you precise control. This makes it perfect for detailed latte art like rosettas, tulips, and swans.
- Traditional Spout: A wider, rounded spout is more forgiving for beginners. It works great for basic shapes and cappuccinos where you need to pour larger amounts of foam.
- Shape and Size: Pitchers are bell-shaped – wider at the bottom than the top. This shape creates a swirling motion during steaming. This swirl breaks down large bubbles and mixes air evenly to create smooth microfoam.
Does Size Matter?
Absolutely. Using the wrong size pitcher makes everything harder.
A pitcher that’s too small will overflow when the milk expands. A pitcher that’s too large makes it hard to position the steam wand properly. This leads to poor texture.
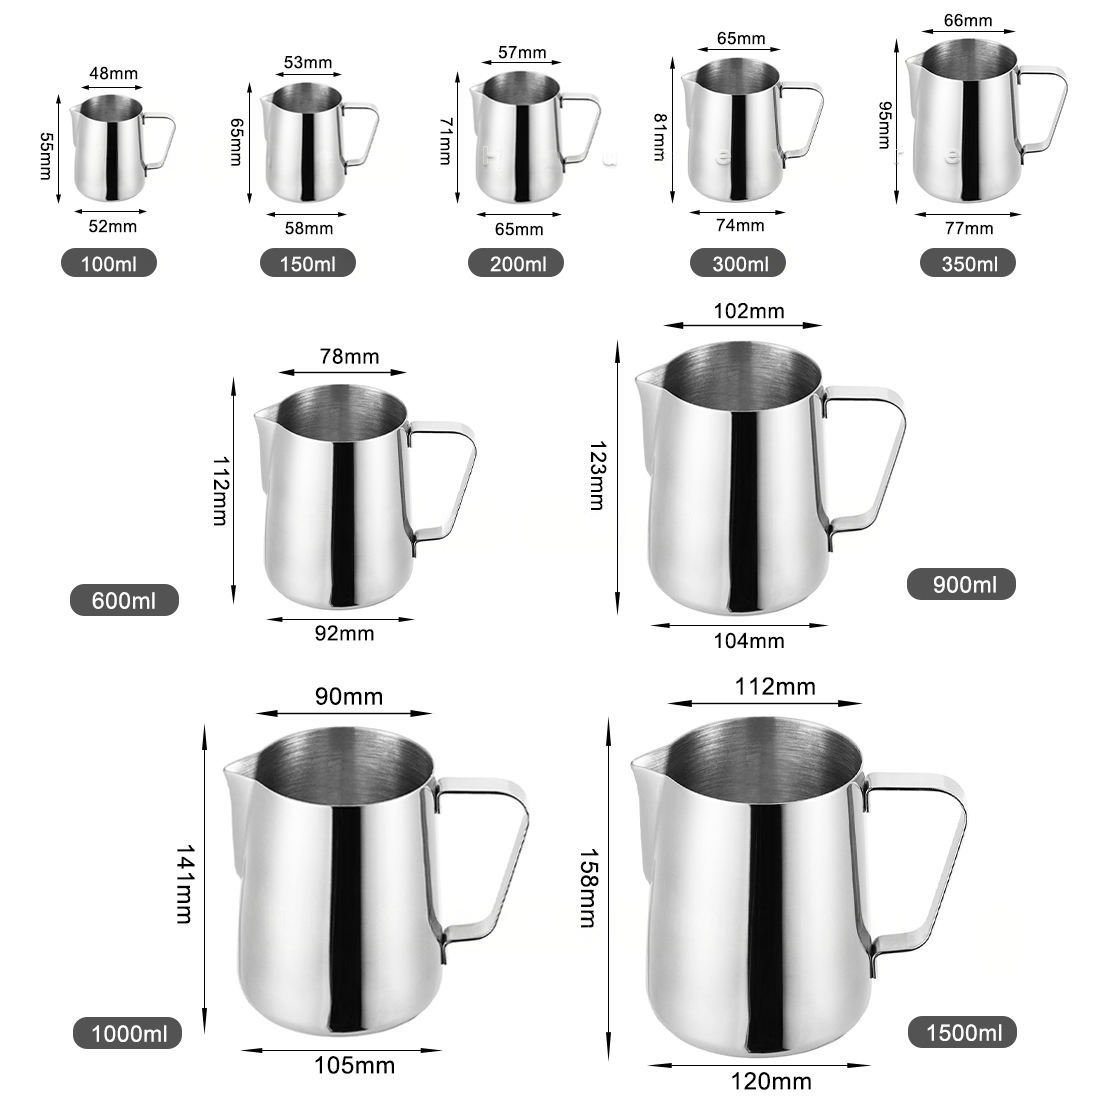
Pitcher Size | Ideal Milk Volume (Pre-Steaming) | Best For | Why It Works |
12 oz (350 ml) | 4-6 oz (120-180 ml) | Single latte or cappuccino | Provides enough headspace for milk to expand without overflowing, while ensuring the steam wand can be properly submerged. |
20 oz (600 ml) | 8-10 oz (240-300 ml) | Two small drinks or one large latte | The most versatile size for home use. Offers a great balance of control and capacity. |
32 oz (1000 ml) | 16-18 oz (480-540 ml) | Multiple drinks at once (professional setting) | Generally too large for home use; makes it difficult to properly texture small amounts of milk. |
Here’s a simple rule: fill your pitcher with cold milk to just below where the spout begins. This leaves about 50-60% of the pitcher empty. This gives the milk plenty of room to expand during steaming.
The Science of Milk
Understanding what happens at the molecular level helps you master frothing. Perfect microfoam balances milk’s natural components with the heat and air you add.
- Protein (The Structure): Milk contains proteins called casein and whey. When you add air with the steam wand, these proteins unfold. They then form a stable network around air bubbles. Think of them as tiny cages that trap air and create foam. This is why the initial “stretching” phase matters so much – it builds the foam’s foundation.
- Fat (The Flavor and Texture): Fat molecules give steamed milk its rich flavor and creamy feel. However, fat can also weaken foam. It can break down the protein network. This is why skim milk often creates stiff, dry foam (lots of protein, no fat interference). Whole milk creates a smoother, silkier texture because the fat spreads evenly throughout.
- Temperature (The Catalyst): Temperature controls the entire process.
- Starting Cold: Always start with very cold milk and a cold pitcher. Cold milk proteins are most stable and flexible. This lets them stretch and trap air better, giving you more working time before the milk gets too hot.
- The Sweet Spot (130-150°F / 55-65°C): This is the perfect temperature range for steamed milk. Here, the proteins create stable foam. The natural sugars (lactose) in milk become more noticeable, making the milk taste sweeter.
- The Danger Zone (Above 160°F / 70°C): If you overheat milk, the proteins break down completely. The foam collapses, you lose the beautiful texture, and the milk develops a burnt taste.
The Specialty Coffee Association (SCA) sets clear standards for milk preparation. These guidelines ensure quality and consistency in professional settings. They’re also great benchmarks for home baristas.
The key takeaway? Whole milk is usually best for silky, sweet, stable microfoam. It has the ideal balance of fat and protein. If you’re using plant-based milks, look for “barista blend” versions. These contain added fats and stabilizers to help them work more like dairy milk.
A Step-by-Step Guide
Now let’s put it all together. Get your espresso machine, cold milk, and pitcher ready. We’ll walk through this process step-by-step using professional barista techniques.
Step 1: Preparation
- Chill Your Tools: Put your stainless steel milk frothing pitcher in the freezer for a few minutes or rinse it with cold water. A cold pitcher keeps milk in the ideal frothing state longer. This gives you more time to work.
- Pour the Milk: Fill your pitcher with cold, fresh whole milk. Pour until the milk reaches the bottom of the spout area inside the pitcher. This is your starting point. Don’t guess – consistency starts here.
- Purge the Steam Wand: This step is essential. Point the steam wand toward the drip tray and turn it on for a few seconds. This removes any water that condensed in the wand. You want only pure, dry steam in your milk, not hot water that dilutes flavor and prevents good foam.
Step 2: Stretching
This is where you create foam volume. The goal is adding air to the milk in a controlled way.
- Position the Wand: Put the steam wand tip just below the milk’s surface. Position it about half an inch from the pitcher’s side. Tilting the pitcher slightly helps create a better swirl later.
- Turn on the Steam: Open the steam valve fully and quickly. You want strong, consistent pressure from the start. Hesitation leads to weak steam and poor results.
- Listen for the Sound: You should immediately hear a gentle “tsss-tsss-tsss” sound. People often describe it as paper tearing. This is the sound of air being drawn into the milk.
If you hear a loud, violent screech, the wand is too deep. If you see large, aggressive bubbles, the wand is too close to the surface. Adjust the depth until you hear that perfect, gentle hiss.
- Lower the Pitcher Slowly: As air mixes in, the milk volume expands. To keep the wand tip just below the surface, slowly and steadily lower the pitcher. This is a subtle movement, not a big drop.
- Duration: This phase is short. It should only last 3-8 seconds, depending on your drink and machine power.
- For a Latte: Stretch for about 3-5 seconds. You want less foam and more silky milk.
- For a Cappuccino: Stretch for about 6-8 seconds. You want thicker, more substantial foam.
Step 3: Texturing
Now that you’ve added air, you need to spin it into silky, uniform microfoam. You’re no longer adding air – you’re refining it.
- Submerge the Wand: After stretching, raise the pitcher slightly to push the steam wand deeper into the milk. About an inch below the surface works well. This stops adding more air.
- Find the Vortex: Keep the wand off-center and the pitcher tilted. This forces the milk to spin in a whirlpool or “vortex.” This vortex is crucial. It breaks down large bubbles into tiny ones and spreads them evenly throughout the milk, creating smooth, glossy texture.
- Monitor the Temperature: Place your free hand flat on the pitcher’s side. This is your thermometer. As the milk spins and heats up, you’ll feel the temperature rise through the stainless steel.
- Stop at the Right Time: When the pitcher becomes too hot to hold comfortably for more than a second, immediately turn off the steam wand. This matches your target temperature of 130-150°F or 55-65°C. It’s always better to be slightly under-temperature than over. Once milk is burnt, you can’t fix it.
- Final Steps: Once the steam is off, remove the wand from the pitcher. Immediately wipe the steam wand with a clean, damp cloth to remove milk residue before it hardens and becomes difficult to clean.
Step 4: Polishing
You’re almost finished. This final step ensures a perfect, glossy finish and prepares the milk for pouring.
- Tap and Swirl: Gently tap the pitcher’s bottom on the counter a couple of times. This forces any remaining large bubbles to the surface where they pop.
- Groom the Milk: Swirl the milk in the pitcher smoothly in circles. The milk should start looking like wet paint – glossy, uniform, with no visible bubbles. This swirling motion is called grooming. It keeps the foam and milk mixed until you’re ready to pour.
A great resource for seeing this entire process is the collection of tutorials from coffee experts like James Hoffmann. Visual learning can complement these written steps.
Your milk is now ready. It should be silky, sweet, and perfectly prepared for your espresso. Speaking of which, having a quality machine makes a huge difference. If you’re looking to upgrade your setup, check out this guide on the best espresso machines with a grinder.
Troubleshooting Mistakes
Even with the best instructions, things can go wrong. Don’t get discouraged. Most problems are common and easily fixed with small adjustments. Here’s a quick guide to diagnosing and solving common problems when you use a milk frothing pitcher.
The Problem | The Look & Feel | Likely Cause(s) | How to Fix It |
“Soapy” Foam | Large, clear bubbles on top; thin, watery milk underneath. Looks like dish soap foam. | 1. Wand tip was too high during stretching. <br> 2. Stretching phase was too long or too aggressive. | Keep the wand tip just below the surface. Aim for the “paper tearing” sound, not a “glug-glug” bubbling. Shorten your stretching time to 3-5 seconds and focus on a gentle introduction of air. |
“Dry” or Stiff Foam | Looks like meringue or styrofoam. Sits on top of the coffee like a hat instead of integrating. | 1. Stretched the milk for far too long. <br> 2. Used skim or low-fat milk, which has a higher protein-to-fat ratio. | Significantly reduce stretching time. If using low-fat milk, be extra conservative with air. For a creamier result, switch to whole milk or a high-quality barista-blend alternative. |
Not Enough Foam | Milk is hot but still very thin, with little to no foam. The volume barely increased. | 1. Wand was submerged too deep from the start, preventing air from being introduced. <br> 2. Steam wand was not purged (injected water instead of steam). <br> 3. Not enough steam pressure from the machine. | Ensure the wand tip starts just below the surface to introduce air. Always purge your wand before starting. Check that your machine’s steam is at full power and has had time to heat up. |
“Screaming” Milk | A loud, high-pitched screeching sound during steaming that is unpleasant to hear. | The steam wand is too deep in the milk, and no air is being introduced. The steam is just violently heating the milk. | Immediately lower the pitcher to bring the wand tip closer to the surface until you hear the gentle “tsss” sound. This indicates air is being incorporated again. |
Burnt or Scalded Milk | Tastes dull, slightly bitter, or “cooked.” The natural sweetness is gone. The foam may have collapsed. | The milk was heated past 160°F (70°C). | Use your hand as a thermometer and stop the moment the pitcher becomes too hot to hold. It’s better to be slightly under-temp than over. Scientific studies on milk protein denaturation confirm that overheating irreversibly damages texture and flavor. |
From Foam to Art

Once you’ve mastered creating silky microfoam, the next exciting step is pouring it. Latte art takes practice, but the basic principles are simple.
First, you need a great canvas. This means a perfectly pulled espresso shot with stable, rich, reddish-brown crema. The quality of your coffee beans is crucial here. Using the best coffee beans for latte gives you richer flavor and more robust crema to pour into.
The Two Pouring Phases
Every latte art pour, from a simple dot to a complex swan, has two distinct phases.
- The “Mixing” Phase:
- Tilt your coffee cup at a 45-degree angle toward the pitcher.
- Start pouring your steamed milk from about 4-5 inches high directly into the deepest part of the espresso.
- Pour in a thin, steady stream. The goal is letting the milk dive underneath the crema and mix with the espresso. This fills about half to two-thirds of the cup and creates your drink’s base.
- The “Painting” Phase:
- Once the cup is about two-thirds full, bring the spout of your milk frothing pitcher as close as possible to the coffee’s surface. The spout should almost touch the liquid.
- Continue pouring. Because the spout is so close, the white microfoam will now appear on the crema’s surface. This is your “paint.”
- As you pour and the cup fills, start leveling the cup to prevent spilling.
Your First Design: The Dot
This is the foundation of all latte art, also called the Monk’s Head. Master this, and you can master anything.
- Follow the “Mixing” phase as described above, filling the cup about two-thirds full.
- Once you’re in the “Painting” phase, bring the spout very close to the surface and aim for the cup’s center.
- Increase your pour rate slightly. A white dot will form on the crema.
- Continue pouring into the center of that dot until you have a circle of your desired size.
- To finish, lift the pitcher high again (about 4-5 inches) and pour a thin stream through the dot toward the cup’s edge. This “cuts” through the dot and creates a classic heart shape.
Mastering this simple dot builds the muscle memory and control you need for more complex designs. For visual inspiration, follow world-class artists and champions like Lance Hedrick, who often break down complex pours into simple, understandable steps.
Remember, every single pour is practice. Even if it doesn’t look perfect, it will still taste delicious. For more fundamental coffee knowledge, our Espresso 101 guide can help round out your skills.
Conclusion: Your Journey
Learning how to use a milk frothing pitcher is a rewarding journey. It transforms your daily coffee routine from a simple habit into a creative craft.
It’s about more than just following steps. It’s about developing a feel for the process. You’ll learn to listen for the right sounds, feel the temperature changes, and watch milk transform into glossy, liquid velvet.
Don’t be afraid to experiment. Try different milks, practice your pours, and pay attention to what works and what doesn’t. Every cappuccino you make and every latte you pour is another step toward becoming a skilled home barista. With the right knowledge and a little practice, that café-quality coffee experience is now in your hands.
As a professional manufacturer specializing in the research, development, and production of coffee machines, we not only offer a diverse product selection but also support OEM/ODM customization to meet the needs of diverse markets and customers. With consistent quality control, fast delivery, and innovative designs, our coffee machines are used by numerous brands and channels worldwide. Whether you're a distributor, wholesaler, or brand owner, we can provide you with reliable solutions to help you grow your business. Contact us to explore potential collaboration opportunities.

Facebook
Twitter
LinkedIn
WhatsApp
Categories: Coffee/Brewing Tips Product Knowledge