
13.10.2025
Is your morning coffee starting to taste weird? Maybe it’s bitter or just not as rich as before. That once-perfect cup now has an “off” quality you can’t quite place.
Before you blame the beans or consider buying a new machine, the real problem is likely hiding in plain sight. Your coffee maker is dirty. This guide will show you how to clean a coffee maker with vinegar. It’s a time-tested, natural, and incredibly effective method.
Over time, mineral deposits called limescale build up inside your machine. Sticky coffee oils and even mold can also accumulate. This hidden grime ruins the taste of your brew. It also puts unnecessary stress on your machine’s internal components.
We’ll walk you through everything you need to know. We cover the science behind why this method works. Then we provide a detailed, step-by-step process. This guide will restore your machine and have you brewing the perfect cup again.
Forget expensive, specialized cleaners. They’re often just overpriced acids. The most powerful solution is probably already in your kitchen pantry, waiting to be used.
Table of Contents
Why You Must Clean
A clean coffee maker is the foundation of a great coffee experience. It’s a non-negotiable part of coffee hygiene.
Many users rinse the carafe and wipe the outside. But the real problems build up internally, completely unseen. Neglecting this crucial maintenance task leads to more than just a bad taste.
It can directly affect your health. It can also drastically shorten the lifespan of your appliance. Understanding these risks is the first step toward better coffee hygiene and, ultimately, better coffee.
If you find that your current machine is difficult to maintain, exploring some of the best coffee makers on the market can give you an idea of modern, user-friendly designs. These designs simplify the cleaning process.
1. Preserve Coffee Taste
The primary reason to clean your machine is for the flavor of your coffee. Two main culprits degrade the taste over time.
First, rancid coffee oils accumulate on every surface the coffee touches. This includes the carafe, the filter basket, and the spray head. These oils impart a bitter, stale flavor into every new pot you brew.
Second, limescale from your tap water coats the internal heating element. This insulation prevents the water from reaching the optimal brewing temperature. The ideal range is between 195-205°F (90-96°C).
When water isn’t hot enough, it can’t properly extract the desirable flavor compounds from the coffee grounds. This results in under-extracted coffee. It tastes weak, sour, or disappointingly flat.
The subtle, delicious notes of your favorite coffee beans get completely masked. Even expensive coffee beans can’t overcome the effects of a dirty machine.
2. Protect Your Health
The internal workings of your coffee maker create a perfect storm for microbial growth. The dark, damp, and warm environment inside the water reservoir and internal tubing is ideal for bacteria.
Studies have shown that coffee reservoirs are a common hotspot for mold, yeast, and various types of bacteria. Every time you brew, you risk flushing these contaminants into your cup.
This can introduce musty, unpleasant odors and flavors into your coffee. More importantly, it can pose a potential health risk. This is especially true for individuals with allergies, asthma, or compromised immune systems.
Regularly cleaning and descaling your machine sanitizes these internal parts. This ensures you’re only brewing coffee, not a cocktail of germs.
3. Extend Machine Life
Limescale is the number one enemy of any water-heating appliance. It’s that hard mineral buildup. It’s the same chalky substance that clogs shower heads and leaves white marks on faucets.
Inside your coffee maker, this scale clogs the narrow internal tubing. It also coats the heating element. This forces the entire system to work significantly harder. The pump and heater struggle to push water through and bring it to temperature.
This constant strain leads to slower brew times. Brewing cycles don’t complete properly. You’ll hear strange noises from the machine. Eventually, it will lead to component failure and a dead coffee maker.
Regular descaling with a product like vinegar prevents this strain. It keeps the internal pathways clear. This allows the machine to operate efficiently, saving you the cost and hassle of a premature replacement.
The Science of Vinegar
The reason vinegar is such a remarkably effective cleaner lies in basic chemistry. It’s a simple, natural solution to a common problem.
Your tap water contains dissolved minerals, unless it’s distilled or reverse-osmosis filtered. The most common of these are calcium and magnesium.
Over time, especially when water is heated, these minerals precipitate out of the solution. They form a hard, chalky deposit known as limescale. This is primarily composed of calcium carbonate and magnesium carbonate.
This is the white crust you see inside tea kettles and on faucets. It’s also secretly building up inside your coffee maker’s heating element and tubing with every pot you brew.
Vinegar is a weak acid. Specifically, the common white distilled vinegar you find in any grocery store contains about 5-8% acetic acid. This acid is the key to the entire cleaning process.
Acetic acid is perfect for dissolving the alkaline mineral deposits of limescale. It creates a chemical reaction that breaks them down.
When the vinegar solution flows through your hot coffee maker, the acetic acid reacts with the solid calcium carbonate. It dissolves it into water, carbon dioxide, and a soluble substance called calcium acetate.
This reaction effectively turns the hard scale into a liquid form. It can then be easily flushed away by the water rinses that follow. It’s a safe, natural chemical reaction that does all the hard scrubbing work for you, deep inside the machine’s tubes.
Why White Distilled Vinegar?
It is critical to use the right type of vinegar for this task. White distilled vinegar is the only option we recommend.
- Purity: It contains no added sugars, coloring, or natural flavoring agents. These additives, found in other vinegars, could leave a sticky residue. They might stain plastic parts or even encourage more bacterial growth.
- Effectiveness: Its acidity level is perfectly balanced. It’s strong enough to dissolve stubborn limescale. But it’s not so harsh that it will corrode the plastic, silicone, and metal components of most standard coffee makers.
- Cost & Availability: It is extremely inexpensive. You can purchase it in large, economical jugs at any grocery store. There is no need for a pricey, single-purpose product.
You must avoid using other types of vinegar for this cleaning task.
Never use apple cider vinegar, balsamic vinegar, or red wine vinegar. Their colors can permanently stain the plastic components of your machine. Their natural sugars can caramelize when heated, creating a sticky mess that is even harder to remove than the original limescale.
The 7-Step Cleaning Guide
Now for the main event. We have broken down the entire process into seven simple, actionable steps.
Follow them carefully in order to ensure a thorough cleaning and a perfect, residue-free result. This process is generally safe and effective for most standard drip coffee makers. It works well for brands like Mr. Coffee, Cuisinart, Hamilton Beach, and Black+Decker.
Once your machine is pristine and brewing at the correct temperature, you might also be interested in learning how to make strong coffee. This will help you get the most out of your clean device.
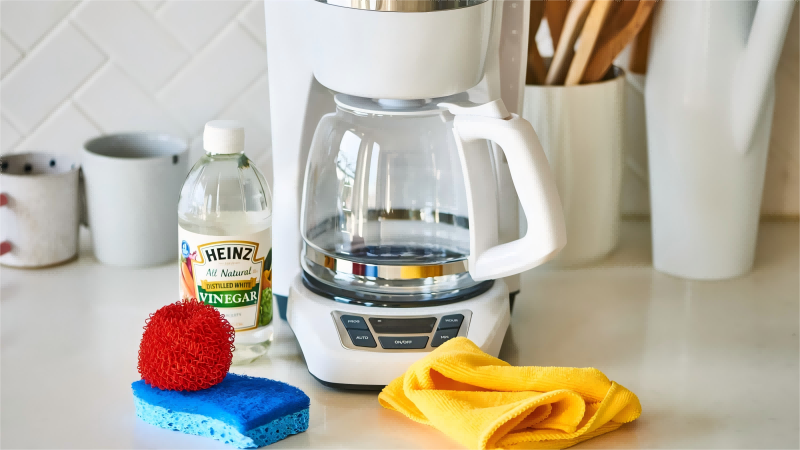
Before You Begin: Supplies
You only need a few basic household items for this entire process. There is no need to buy anything special.
- White Distilled Vinegar
- Fresh, Cold Water
- A clean, empty sink
- Standard dish soap
- A soft sponge or cloth
Step 1: Empty and Disassemble
First things first: safety and preparation. Ensure your coffee maker is unplugged from the wall outlet. Make sure it’s completely cool to the touch.
Pour out any leftover coffee from the carafe. Discard it down the sink. Open the brew basket area and remove the filter holder. Discard any used coffee grounds and the paper filter.
Gently remove all of the machine’s detachable parts. This typically includes the glass or thermal carafe, the carafe lid, and the plastic brew basket that holds the filter.
Step 2: Wash Removable Parts
Take the carafe, lid, and brew basket to your sink. Wash these components thoroughly with warm, soapy water.
Use a non-abrasive sponge or cloth to scrub away any visible brown stains. These are built-up coffee oils that can become rancid and spoil the taste of fresh coffee. Pay special attention to the inside of the carafe. Also focus on the small opening where coffee drips out of the brew basket.
This step is important because it ensures you aren’t reintroducing old grime and oils back into your freshly cleaned machine.
Rinse all parts thoroughly with clean water to remove any soap residue. Set them aside on a dish rack or towel to air dry while you clean the machine’s interior.
Step 3: Prepare Vinegar Solution
This is the most crucial step for an effective descaling process. You will be creating a cleaning solution using your white vinegar and fresh water.
The ideal ratio for this solution is 1:1. This means one part white vinegar to one part water.
For a standard 12-cup coffee maker, you would typically use 6 cups of vinegar and 6 cups of water to fill the reservoir. If you have a 10-cup machine, use 5 cups of each.
Fill the water reservoir of your coffee maker with this mixture. There’s no need to be perfectly exact to the milliliter. Just aim for a roughly equal balance.
Using a stronger vinegar concentration is not necessarily better. It can be overly harsh on some components. It will also be much more difficult and time-consuming to rinse out completely later on.
Step 4: Run a Half-Brew Cycle
With the cleaning solution in the reservoir, you can now begin the internal cleaning.
Place the empty carafe back on the warming plate. Insert the empty brew basket back into its place, without a filter.
Plug the coffee maker back in and turn it on to start a normal brew cycle.
Let the machine run until the reservoir is about half empty. This will fill the carafe with about half of the hot vinegar solution.
As the hot vinegar works its way through the machine, you might notice a more pronounced gurgling or hissing sound than usual. This is normal. It’s actually a good sign that the acetic acid is actively dissolving the mineral buildup inside the machine’s heating chamber and tubes.
Step 5: Let It Sit and Soak
Once the brew cycle is about halfway complete, turn off the coffee maker.
Let the remaining hot vinegar solution sit inside the machine’s internal components. The hot solution that is now in the carafe should also be left to sit.
Allow everything to soak for at least 30 to 60 minutes.
This “soak time” is a critical part of the process. It allows the hot acetic acid the necessary contact time to dissolve the most stubborn, layered limescale deposits. A quick flush-through might otherwise miss these deposits. Don’t skip this step.
Step 6: Complete the Brew Cycle
After the 30-60 minute soak is complete, turn the coffee maker back on.
Allow it to complete the rest of the brewing cycle. The machine will process the remaining vinegar solution from the reservoir into the carafe.
Once the cycle is finished and the machine is quiet, carefully remove the carafe. It will be full of hot, dirty vinegar solution that has stripped the scale and grime from the machine’s interior. You may even see flaky white or dark particles in the solution.
Discard this entire solution down the sink drain.
Step 7: Run Fresh Water Rinses
This is the final, and equally important, part of the entire process: rinsing. You must thoroughly flush out all traces of vinegar. This prevents a sour, vinegary tang in your next batch of coffee.
First, rinse the carafe and brew basket with fresh water to remove the concentrated vinegar solution.
Next, fill the water reservoir to its maximum capacity line with fresh, cold water.
Run a full brew cycle with just the fresh water. Once complete, discard the hot water from the carafe.
Repeat this fresh water rinse cycle at least two more times, for a total of three full rinses.
After the second or third rinse, take a moment to smell the inside of the brew basket. Also smell the water coming out of the machine. If you still detect a noticeable vinegar odor, it’s best to run a fourth or even a fifth rinse cycle.
It’s always better to use a little extra water for one more rinse than to have your expensive coffee ruined by a lingering vinegar taste. Once the vinegar smell is completely gone, your coffee maker is clean, descaled, and ready to brew!
Adapting the Method
The 1:1 vinegar solution is a universal starting point for descaling. However, the exact process can and should vary depending on your specific type of coffee maker.
Here’s how to adapt this effective cleaning method for some of the most common models found in homes and offices.
Keurig & Pod Brewers
Cleaning a Keurig or another single-serve pod brewer is simple. But it requires a slightly different approach since there is no large carafe to catch the solution.
- Preparation: Start by unplugging the machine. Empty the water reservoir completely and remove the water filter, if your model has one. Make absolutely sure there is no K-Cup pod in the holder.
- Solution: Fill the reservoir to the max fill line with the 1:1 solution of white vinegar and water.
- Brewing: Place a large, ceramic mug on the drip tray to catch the hot liquid. Do not use plastic. Turn the machine on and run consecutive brewing cycles using the largest cup size setting. Do this without a pod.
- Cycle Through: Continue running brew cycles, discarding the hot vinegar water from the mug after each one. Do this until the machine’s “Add Water” light comes on.
- Soaking: With the remaining solution still inside the internal boiler, let the machine sit powered on for 30 minutes. This allows the internal vinegar to soak and dissolve scale.
- Rinsing: After the soak, thoroughly wash the reservoir with soap and water. Refill it with fresh, cold water. Run at least 10-12 cleansing brews using only fresh water (no pod) to completely flush the system. This high number of rinses is vital for single-serve machines to remove all vinegar taste.
For those considering an upgrade or a new single-serve machine, our review of the best Keurig coffee makers can be a helpful resource.
Thermal Carafe Machines
If your drip machine has a stainless steel thermal carafe instead of a glass one, the process is mostly identical to the main guide. But there’s one crucial difference.
You must take special care of the carafe itself.
Do not let the hot vinegar solution sit inside a stainless steel thermal carafe for the 30-60 minute soak period. The prolonged contact with the acid can potentially tarnish or damage the metal lining. In some cases, it can impart a permanent metallic taste.
Instead, discard the hot vinegar solution from the carafe immediately after the first half of the brew cycle is complete. Then, when the full brew cycle is done, discard that solution immediately as well.
To clean the inside of the thermal carafe, use a dedicated bottle brush with a paste made from baking soda and water. This will gently scrub away coffee stains without damaging the steel.
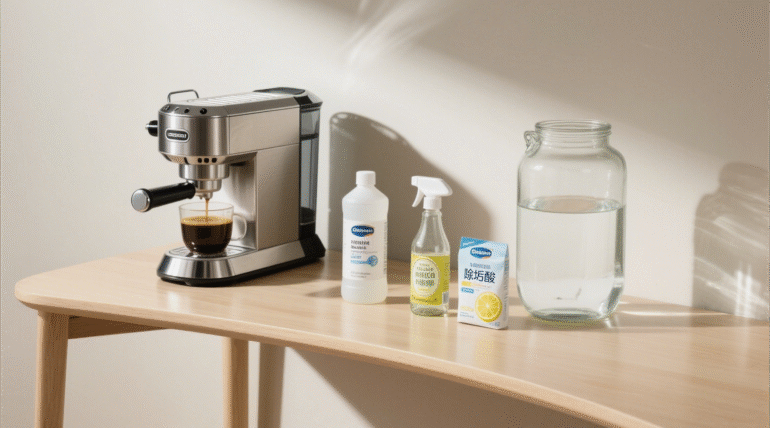
A Note on Espresso Machines
WARNING: Proceed with extreme caution. This is a critical point for owners of more complex machines.
Vinegar can sometimes be used on very basic, entry-level steam-powered espresso machines. However, it is strongly discouraged for most semi-automatic and automatic espresso machines.
The reason for this is their complexity. These machines have intricate internal systems with boilers, pumps, and valves made from metals like brass, aluminum, and copper. The acetic acid in vinegar can be too aggressive and can corrode these components over time.
Using vinegar in these machines can cause irreversible damage. It can lead to costly repairs and will almost certainly void your manufacturer’s warranty.
Instead, you must always use a commercial descaling solution that is specifically formulated and approved for use in espresso machines. More importantly, always follow the manufacturer’s specific cleaning and descaling instructions in your user manual.
Proper maintenance is key for these machines. If you are passionate about your espresso, investing in a quality coffee grinder is just as important as keeping the machine itself in perfect working order.
How Often to Clean
Regular, preventative cleaning is far more effective than waiting for a problem to arise.
If you wait until your coffee tastes bad or your machine starts slowing down, it means the limescale and oil buildup is already severe. At that point, it’s harder to remove.
To keep your machine in peak condition and your coffee tasting great, you should perform a full vinegar descale on a consistent, recurring schedule.
As a general rule of thumb for a daily coffee drinker, we recommend you clean your coffee maker once every one to three months.
However, the ideal frequency depends heavily on two main factors. These are how often you use the machine and, more importantly, the hardness of your local tap water.
Hard water contains a much higher concentration of dissolved minerals like calcium and magnesium. This will cause limescale to build up inside your machine much faster than soft water will.
Here is a more specific cleaning schedule to follow based on your water type:
Water Type | Usage | Recommended Cleaning Frequency |
Soft Water | Daily User | Every 3-6 months |
Moderately Hard | Daily User | Every 2 months |
Hard Water | Daily User | Once a month |
Any Water Type | Infrequent | Every 6 months, or before use |
How can you tell if you have hard water? The telltale signs are easy to spot around your home. Look for white, chalky residue on your faucets, shower doors, and glassware. Another sign is soap or shampoo that doesn’t lather well.
If you see these signs in your kitchen and bathroom, you almost certainly have hard water. You should therefore aim to descale your coffee machine on a more frequent, monthly basis to prevent damage.
Troubleshooting & Mistakes
Even with a perfect guide, you might run into a few small issues or have questions during the process.
Here are the solutions to the most common problems people face when they clean a coffee maker, based on our experience.
“My coffee tastes like vinegar!”
This is by far the most common issue people encounter. Thankfully, the fix is simple. It is almost always caused by insufficient rinsing after the vinegar cycle.
The solution is simply to run more fresh water through the machine.
Fill the reservoir completely with fresh, cold water and run two or three more full brew cycles. Discard the water after each cycle. The lingering taste is just trace amounts of acetic acid, which is water-soluble. A few more flushes will clear it out completely.
“The ‘Clean’ light is still on.”
Many modern coffee makers have an internal counter or sensor that triggers a “Clean” or “Descale” light after a set number of uses. Sometimes, a standard vinegar run doesn’t automatically reset this indicator.
First, check your user manual. Often, there is a specific combination of buttons you need to press and hold. For example, you might need to hold two buttons down simultaneously for three seconds to manually reset the cleaning indicator light.
If that doesn’t work, it could mean the machine’s internal sensors still detect significant scale buildup. In this case, you may need to run a second, full vinegar cleaning cycle. Make sure not to skip the crucial soak step.
“Can I use more vinegar?”
It can be tempting to think a stronger solution will be more effective. But we do not recommend it. A 1:1 ratio of vinegar to water is the sweet spot for both safety and effectiveness.
A solution that is too acidic can be overly harsh on internal rubber gaskets, seals, and plastic tubes. This can potentially cause them to become brittle over time.
Furthermore, a more concentrated solution becomes much more difficult and time-consuming to rinse out completely. This greatly increases the risk of having that lingering vinegar-taste problem. Stick to the 50/50 mix for the best results.
If your machine is nearing the end of its life, you can check out our guide on the best drip coffee makers to find a new one that fits your needs.
“I forgot to let it soak.”
You ran the entire vinegar solution through the machine without stopping for the 30-60 minute soak. Do you need to start over?
Not necessarily. A full cycle of hot vinegar running through the machine will still remove a good amount of light scale and coffee oil residue. If your machine wasn’t heavily scaled to begin with, or if you clean it regularly, it might be clean enough.
However, if you have very hard water or if it’s been six months or more since your last cleaning, we highly recommend doing the process again. This time, be sure to include the 30-60 minute soak time. That extended contact period is what truly tackles the really stubborn, layered mineral deposits.
Conclusion: A Clean Machine
Maintaining your coffee maker doesn’t have to be a complicated chore. You don’t need expensive gadgets or harsh, specialized chemicals.
As we’ve shown, the simple and incredibly affordable process of using white vinegar and water is all you need. This dramatically improves your daily coffee experience.
By investing just an hour of your time every month or two, you’re doing more than just cleaning an appliance. You are ensuring better-tasting coffee. You’re promoting a healthier kitchen environment. You’re also actively extending the functional life of your machine.
Now that you know how to clean a coffee maker with vinegar, you have the power to combat limescale buildup. You can eliminate bacteria and banish bitter coffee from your morning routine for good.
As a professional manufacturer specializing in the research, development, and production of coffee machines, we not only offer a diverse product selection but also support OEM/ODM customization to meet the needs of diverse markets and customers. With consistent quality control, fast delivery, and innovative designs, our coffee machines are used by numerous brands and channels worldwide. Whether you're a distributor, wholesaler, or brand owner, we can provide you with reliable solutions to help you grow your business. Contact us to explore potential collaboration opportunities.

Facebook
Twitter
LinkedIn
WhatsApp
Categories: Maintenance/Service Product Knowledge Uncategorized