Latte Art · Pitcher Sizing · Cafe & OEM Guide
What Size Milk Pitcher Do You Need for Latte Art?
Match cup size, cold-milk dose, steam-wand geometry, working fill, and pour control before choosing 300 ml, 350 ml, 450 ml, or 600 ml.
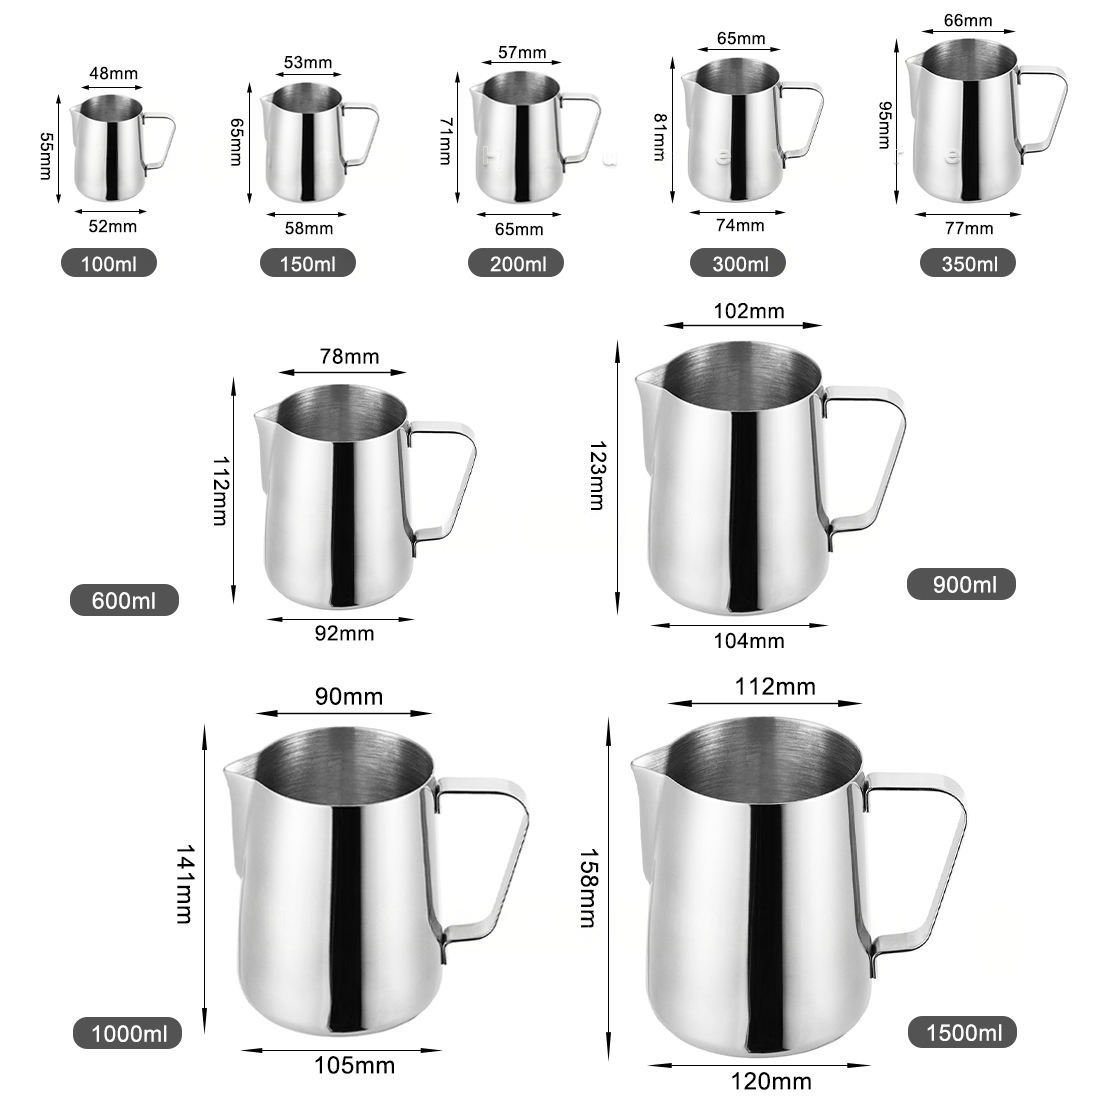
The Quick Answer
For most single-cup latte art, start with a 350–450 ml (12–15 oz) milk pitcher. Choose 300–350 ml for cups under about 6 oz and small milk doses. Move to 500–600 ml for one large latte or two smaller drinks. The best size is the smallest pitcher that gives the steam tip useful depth, supports a stable rolling motion, leaves headspace for aeration, and still feels controlled at the cup.
Cup capacity is not the same as the amount of cold milk placed in the pitcher. Espresso, target foam, steam condensation, milk retained on the walls, and any planned waste all change the actual starting dose. Measure the recipe first, then choose the pitcher.
Key Takeaways
- A 350–450 ml pitcher is the most useful starting range for one 6–10 oz latte, cappuccino, or flat white.
- A compact 300–350 ml pitcher suits cortados, piccolos, and cups under about 6 oz when the steam wand fits the lower milk depth.
- A 500–600 ml pitcher is more practical for a large latte, a 12 oz takeaway drink, or two smaller coffees.
- Nominal capacity is not working milk volume. Body width, taper, top angle, markings, and steam-wand geometry change the usable fill.
- For a cafe, a compact single-drink pitcher plus a 600 ml service pitcher normally covers more tasks than one oversized universal jug.
Milk Pitcher Size Chart for Latte Art
| Drink or task | Useful starting pitcher | Why it works | Main caution |
|---|---|---|---|
| Macchiato, piccolo, or cortado; cup under 6 oz | 300–350 ml / 10–12 oz | Keeps a small milk dose deep enough and reduces filled weight | Can overflow quickly or conflict with a long steam wand |
| Flat white or cappuccino; 5–8 oz cup | 350–450 ml / 12–15 oz | Balances steaming depth, headspace, and pour agility | The best point depends on body width and steam power |
| Standard latte; 8–10 oz cup | 400–500 ml / 14–17 oz | Carries enough milk while remaining manageable near the crema | Do not match cup ounces directly to pitcher ounces |
| Large latte; 10–12 oz cup | 500–600 ml / 17–20 oz | Provides more working volume and aeration space | May feel oversized if the actual milk dose is small |
| Two small 6–8 oz drinks | 600 ml / 20 oz | Supports a larger dose and an efficient service workflow | Recombine and pour promptly before the second cup |
| Large 12–16 oz takeaway drink | 600–700 ml / 20–24 oz | Matches higher milk demand and provides headspace | Confirm the machine can texture the larger batch |
| Batch service or hot chocolate | 900–1000 ml / 30–34 oz | Prioritizes capacity and throughput | Filled weight and low agility make fine single-cup art harder |
Fast decision: If you make one 6–8 oz drink at a time, compare a 350 ml and a 450 ml pitcher. If you regularly make two drinks or one large latte, add a 600 ml pitcher. Buy from measured milk dose and steam-wand fit, not cup capacity alone.

Nominal Capacity Is Not Working Milk Volume
A product marked 450 ml does not necessarily accept 450 ml of cold milk for steaming. Nominal capacity may be a brim volume, a rounded market label, or a model-family designation. Working fill is the practical starting amount that maintains useful milk depth and headspace with a particular steam system and recipe.
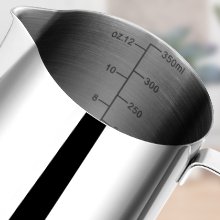
An internal mark is only a volume reference. It may support dosing, but it is not automatically the safest or best latte-art fill. Confirm what the manufacturer means and test the mark with the intended cup, beverage, and steam wand.
Total or brim volume
The maximum physical volume before liquid reaches the rim. It is normally not a steaming target because it leaves no useful headspace.
Nominal product size
A rounded market label such as 350 ml, 450 ml, or 600 ml. Equal labels do not guarantee equal body geometry or working volume.
Working fill
The tested cold-milk amount for a specific drink, machine, steam tip, and texture target.
Usable pour volume
The textured milk available after expansion, steam condensation, wall retention, and any intentional waste are considered.
Official examples show why the distinction matters
Subminimal lists its FlowTip at 450 ml / 15 oz total volume while publishing an approximate recommended capacity of 180 ml. That is a model-specific working-volume example, not a universal rule for every 450 ml pitcher.[2]
Fellow offers the Eddy pitcher in 12 oz and 18 oz sizes and states that the 12 oz model has internal markings up to 10 oz, while the 18 oz model has markings up to 12 oz. Those details again show that advertised size, measurement marks, and preferred starting fill are separate specifications.[3]


Milk Pitcher, Milk Jug, Frothing Pitcher, or Steaming Jug?
The coffee industry uses these names for the same general tool. “Milk pitcher” and “latte art pitcher” are common in North America; “milk jug” is common in the United Kingdom and Australia; “frothing pitcher” and “steaming jug” emphasize the preparation task. The words do not create a technical size standard.
A “12 oz” product can differ from another 12 oz model in brim volume, body diameter, top angle, usable milk depth, markings, and spout geometry. Compare the drawing, capacity method, and working-fill guidance rather than assuming the label guarantees equivalent performance.
Why Pitcher Size Changes Milk Steaming
Size affects steaming through milk depth, headspace, vessel diameter, taper, steam-jet momentum, and heating rate. The steam tip must enter far enough to inject steam and create circulation, while remaining near enough to the surface during stretching to introduce controlled air. A small dose in a wide pitcher may be too shallow; too much milk in a compact pitcher can reach the rim before bubbles are integrated.
Milk depth and steam-tip position
Long steam wands, large multi-hole tips, compact domestic machines, and automatic steam systems do not interact with the same pitcher in the same way. The smallest pitcher that works on one machine may collide with the wand, rim, handle, or drip tray on another. Check the physical combination before deciding.
Headspace for aeration
Air incorporation increases foam volume and condensing steam adds water. Expansion depends on drink style, milk, air intake, and endpoint. A flat white generally needs less aeration than a dry cappuccino, while plant beverages can behave differently from dairy. “Fill every pitcher halfway” is therefore a starting heuristic, not a universal specification.
Body diameter, taper, and circulation
The visible rolling motion results from steam-jet direction, pitcher wall shape, wand angle, tip depth, and milk volume. Capacity alone does not define the body. Two 450 ml pitchers can create different circulation with the same machine because one is wide and low while the other is tall and narrow.
Heating rate and control window
A small dose normally reaches the endpoint faster than a large dose on the same steam system. That can make a compact pitcher feel demanding on a powerful commercial wand. A larger batch gives more time but needs more energy. Wall mass, milk type, starting temperature, steam pressure, and technique change the result, so size should not be presented as a guaranteed steaming time.
Published milk-frothing research shows that composition, processing, viscosity, air entrainment, steam conditions, bubble distribution, and temperature affect foam performance.[5][6] A well-sized pitcher supports the process; its nominal milliliters do not create microfoam by themselves.
Why Pitcher Size Changes Latte-Art Pouring
Steaming needs depth, headspace, and circulation. Pouring needs predictable balance, clean release, and enough textured milk to complete the pattern. A pitcher may steam acceptably but feel awkward at the cup because the remaining milk level forces a steep angle or places the center of mass too far from the hand.
- Filled weight and inertia: a compact pitcher reacts quickly to wrist motion; a larger filled pitcher feels more planted but can slow reversals and increase fatigue.
- Pour-start angle: a higher milk level reaches the spout with less tilt. A very low level may force a steep angle that prevents the tip from approaching the crema.
- Enough milk to finish: filling, drawing, and the final cut all consume milk. If the pitcher empties too early, the last foam may release as a thick separated mass.
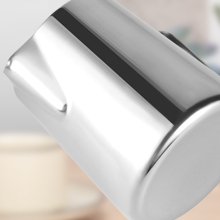
- Spout and top angle: a slanted rim can reduce the tilt required before flow begins, while spout geometry affects stream focus and release.
- Handle and balance: the best nominal size can still be the wrong tool if the filled grip position forces compensation.
Which Milk Pitcher Size Should You Choose?
300–350 ml: small cups
Best suited to cortados, piccolos, macchiatos, small cappuccinos, and many 5–6 oz flat whites. It keeps small doses deeper and reduces filled weight.
- Quick response for compact patterns.
- Lower milk waste when dosing is accurate.
- Limited headspace and a fast heating window.
350–450 ml: single-cup sweet spot
The most useful range for one 6–10 oz milk drink. A 350 ml model favors compact recipes; 400–450 ml provides more headspace without the mass of a 600 ml service pitcher.
- Strong general choice for beginners.
- Good balance of depth and agility.
- Body width still determines the real working fill.
500–600 ml: large or double drinks
Useful for one large latte, a 10–12 oz cup, or two smaller drinks. It can feel calmer on a powerful steam system but carries more mass during detailed pouring.
- More expansion space for larger batches.
- Efficient for double orders.
- Often oversized for one small cup.
750–1000 ml: defined batch tasks
Appropriate for catering, hot chocolate, simple multi-drink service, or other high-volume tasks. It is rarely the easiest tool for detailed art in one small cup.
- Throughput before fine control.
- High filled weight and inertia.
- Needs sufficient steam power.
Slow Pour Supply publishes a model-family overview pairing 10 oz pitchers with cups under 6 oz, 15 oz pitchers with 6–10 oz cups, 17 oz pitchers with 8–12 oz cups, and 22 oz pitchers with 12–16 oz cups.[4] This is useful evidence that manufacturers design size families around cup ranges, but it should not be treated as a universal industry standard.
Which Size Is Best for Beginners?
A beginner making one 6–8 oz drink should begin with a 350–450 ml pitcher. The 350 ml option gives clear feedback and can reduce waste when the dose is accurate. The 450 ml option offers more headspace and can be more forgiving when the learner adds too much air.
Do not solve every beginner problem by buying a larger pitcher. Bubbly foam, screaming steam, weak circulation, or white milk disappearing below the crema can be caused by technique, milk, steam power, cup position, or spout geometry. Change one variable at a time.
What About Oat, Soy, and Other Plant Milks?
Do not assume the dairy fill line automatically works for every plant beverage. Protein, fat, stabilizers, viscosity, foamability, expansion, and drainage vary by formulation. The same pitcher can therefore behave differently even when cup size is unchanged.
Start with the dairy-tested pitcher size, then repeat the same steaming and pouring test with the actual barista formulation. If the beverage expands less, a reduced fill may become too shallow; if it produces more foam volume, headspace may become the limiting factor.
Choose Your Pitcher Size in Six Controlled Tests
- Measure the cup. Record actual internal beverage volume rather than trusting the label alone.
- Measure the recipe. Weigh or measure the cold milk normally used, including a realistic retention allowance. Repeat for important plant beverages.
- Check wand fit. With the machine off and the correct dose in the candidate pitcher, confirm that the steam tip can reach the intended position without interference.
- Run a steaming test. Use the same milk, starting temperature, steam setting, operator, and endpoint. Record circulation, texture, time, and overflow risk.
- Run a pouring test. Pour a simple heart and one line-dependent pattern into the target cup. Score pour-start angle, filled weight, spout clearance, and milk remaining for the cut.
- Measure waste and repeatability. Repeat several cycles and record unused milk, variation, cleanup, and user preference. Select from the sequence, not one highlight pour.

Troubleshooting Size-Related Problems
| Symptom | Likely issue | How to confirm | Corrective action |
|---|---|---|---|
| Milk overflows during stretching | Pitcher too small, dose too high, or excessive aeration | Repeat with measured milk in the next size up | Reduce dose or air intake, or choose more working volume |
| Steam tip cannot stay submerged | Milk too shallow for body diameter or wand length | Check depth before steaming with the intended dose | Use a narrower body or a compatible smaller pitcher |
| No stable rolling motion | Dose and body shape do not match steam-jet direction | Compare equal-capacity pitchers with different taper or diameter | Adjust wand position; change body geometry if needed |
| Milk heats before texture develops | Dose too small for steam power or circulation starts late | Time the same dose and review tip position | Improve positioning or use a practical larger dose-and-pitcher pair |
| Pitcher empties before the pattern finishes | Dose too low, high retention, or steep final angle | Weigh milk before steaming and after the pour | Refine dose or choose geometry with better release |
| Pour feels heavy and slow | Pitcher or batch is larger than the cup requires | Compare filled weights with the same pattern | Move down a size without losing steaming depth |
| Second pour looks thin or foamy | Drainage and separation during the first cup | Compare both cups at a fixed delay | Recombine promptly or steam separate batches |
| Same labeled size behaves differently | Different brim volume, width, taper, spout, or markings | Measure drawings and water capacity | Qualify by model and golden sample, not label alone |
For a technique refresher before size testing, see Coffmach's milk frothing pitcher use guide. Size comparisons are more meaningful after basic aeration and rolling technique become reasonably consistent.
Cafe Stocking, OEM, and Wholesale Selection
A practical specialty-cafe station normally benefits from at least two functional sizes: a compact pitcher for single small drinks and a 600 ml pitcher for large or double orders. Add a 400–450 ml specialist model when most cups are 6–10 oz, and add a larger batch pitcher only when a documented menu task requires it.
Standardize pitcher assignment by menu family, working fill, cup, and milk type. This produces more useful purchasing data than stocking every size equally or letting each shift use an unrelated personal preference. Coffmach's commercial milk jug guide provides additional workflow and durability considerations.
A capacity label is not a complete OEM specification
For a private-label project, “350 ml milk pitcher” must be converted into measurable geometry and a functional test. A sample can meet the nominal capacity and still fail because the body is too wide for the intended dose, the top angle forces excessive tilt, or the filled balance does not suit the target cup.
- Define nominal capacity, fill point, measurement method, and project tolerances.
- State the intended cold-milk working fill and internal ml/oz marks for each target recipe.
- Specify body height, top and bottom diameter, taper, rim angle, and base geometry.
- Dimension spout projection, opening, lip radius, centerline, and alignment to the handle or grip reference.
- Define stainless grade, wall target, interior finish, exterior coating, logo process, and cleaning method.
- Approve each size using its own golden sample, machine, steam tip, milk, cup, pattern, and pass criteria.
Build the commercial SKU around a tested workflow
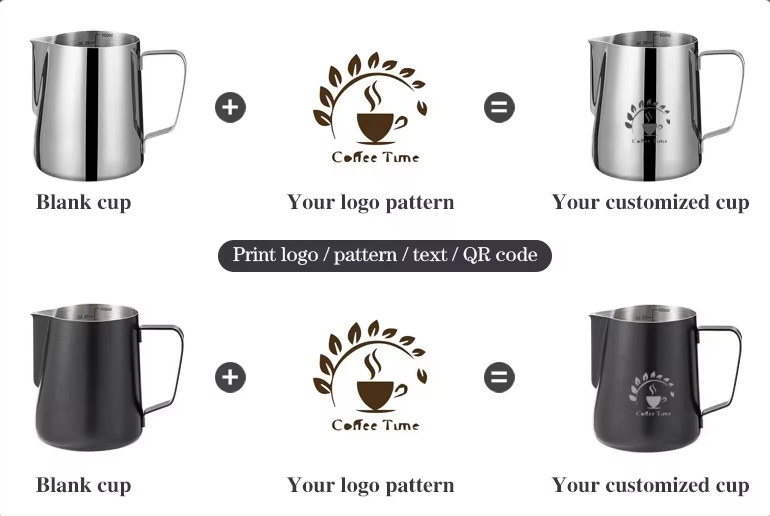
Coffmach currently presents ready-stock sizes from 100 to 1500 ml plus customization for capacity, material or finish, color, measurement marks, logos, and packaging.[1] Treat this as a capability overview and confirm project-specific availability, material documents, tolerances, order quantity, and schedule in the quotation.
When isolating size effects, request adjacent capacities with the same material, spout family, handle, and finish. Otherwise, the trial compares several design variables at once.
Official Coffmach product image. Click the image to open the source page.
RFQ checklist for a custom latte-art pitcher
- Target user, skill level, menu, cup sizes, milk recipes, and drinks per batch.
- Nominal capacity, capacity test method, tolerance, working-fill marks, and required units.
- Body dimensions, taper, top angle, spout geometry, handle or handleless grip, empty weight, and filled balance.
- Material declaration, wall specification, interior finish, coating, logo process, and cleaning instructions.
- Golden-sample process, steam-system setup, target patterns, overflow limit, pour score, and waste measurement.
- Destination-market food-contact evidence, labels, packaging, inspection plan, quantity, destination, and replacement policy.
Coffmach project brief: Send the target cup and cold-milk dose—not only the desired pitcher milliliters. Compare adjacent sizes with a controlled steaming and pouring protocol before approving mass production. See the custom coffee milk jug options and the OEM and private-label sourcing guide.
Common Milk Pitcher Size Mistakes
- Matching pitcher ounces directly to cup ounces. The cup also contains espresso, while the pitcher requires milk depth and aeration space.
- Treating brim capacity as the steaming fill. A full-to-the-rim pitcher has no useful headspace.
- Buying a large pitcher only to avoid overflow. Correct dose and air intake first, then move up if working volume remains the constraint.
- Assuming smaller always means finer latte art. Spout geometry, milk texture, flow, height, and motion also control line definition.
- Comparing sizes from unrelated body and spout families. Use matched designs when you want to isolate capacity.
- Stocking one size for every drink. A universal pitcher normally creates waste on small drinks or capacity limits on large orders.
Frequently Asked Questions
What size milk pitcher is best for one latte?
For one 6–10 oz latte, start with a 350–450 ml (12–15 oz) pitcher. Choose the smaller end when the milk dose and cup are compact; choose the larger end for more headspace or an 8–10 oz cup. Confirm that the steam tip can create a stable roll and that enough milk remains to finish the pattern.
Is a 350 ml or 600 ml pitcher better for latte art?
A 350 ml pitcher is generally easier for one small 6–8 oz drink because it is lighter and requires less milk for useful depth. A 600 ml pitcher is better for a large latte or two smaller drinks. Neither is universally better; machine geometry, body width, dose, and pour style decide the result.
Is a 450 ml milk pitcher good for latte art?
Yes. A 450 ml pitcher can work very well for 6–10 oz cups when its body maintains useful milk depth at a moderate working fill. Official examples show that 450 ml total capacity may be paired with about 180 ml recommended liquid volume, but that figure is model-specific and must not be copied to every pitcher.
Can I use a 600 ml pitcher for one cup?
Yes, especially for a large latte or when the body maintains adequate milk depth. For a small 6 oz cup, a 600 ml pitcher may require excess milk, feel heavy, or demand a steep final tilt. Compare it with a 350–450 ml pitcher using the same dose and cup.
What size pitcher should I use for a 6 oz cup?
Start with 300–400 ml (10–14 oz). A 350 ml pitcher is a practical middle choice, while a 300 ml specialist body can suit very small doses and a 400 ml model provides more headspace. Wand fit, milk depth, and pour-start angle are the decisive tests.
How full should a milk pitcher be for latte art?
There is no universal fraction. Use enough cold milk to cover the steam tip and form stable circulation while leaving headspace for the intended aeration. The base of the spout can be a visual starting point, but a measured recipe or validated internal mark is more reliable.
What size pitcher do I need for two lattes?
A 600 ml (20 oz) pitcher is a useful starting point for two small 6–8 oz drinks. Larger cups or foam-heavy recipes may need more capacity, while two separate batches may produce more consistent detailed art. Measure the combined cold-milk dose and check that the machine can texture it efficiently.
Does a larger milk pitcher make better microfoam?
No. A larger pitcher helps only when it corrects depth, headspace, or circulation for the intended dose. Microfoam also depends on milk composition, starting temperature, steam pressure, air incorporation, wand position, and endpoint. An oversized pitcher with shallow milk can make texturing harder.
Do plant milks need a different pitcher size?
Sometimes. Plant beverages differ in protein, fat, stabilizers, viscosity, expansion, and drainage. Start with the size used for the same dairy drink, then validate the actual formulation. Change working fill or size only when testing identifies milk depth or headspace as the problem.
Should a cafe buy 350 ml and 600 ml pitchers?
For many cafes, yes. A 350–450 ml pitcher handles single small drinks and detailed art, while a 600 ml pitcher handles large or double orders. Exact inventory should follow menu mix, cup sizes, measured milk waste, cleaning cycles, and the number of barista stations.
Technical Sources
- Coffmach: Coffee Milk Jug — current product imagery and supplier-listed capacity, material, marking, logo, finish, and packaging options.
- Subminimal: FlowTip Milk Jug — official model example listing approximately 180 ml recommended capacity and 450 ml / 15 oz total volume.
- Fellow: Eddy Steaming Pitcher — official 12 oz and 18 oz model sizes, internal markings, material, and body/spout details.
- Slow Pour Supply: WPM Pitcher Collection — official seller's model-family cup-to-pitcher size overview.
- International Dairy Journal: Effect of Steam Frothing on Milk Microfoam — milk composition, processing, texture, viscosity, bubbles, and stability under steam frothing.
- LWT: Effects of Manufacturing Conditions on Foamed Milk — processing conditions, foam stability, bubble size, and sensory characteristics.