
29.10.2025
Want to make amazing espresso at home? Most people start with a shiny new machine and premium beans. But there’s a small, humble tool that sits between these two essentials. It has enormous power over how your coffee tastes: the coffee tamper.
This complete Coffee Tamper Guide: Types, Sizes, and How to Use Them will help you master this simple tool. Think of it as your secret weapon for café-quality espresso.
Many beginners ignore the tamper. They see it as just another accessory. This is a mistake. Learning to use it properly is essential. Good tamping makes water flow evenly through your coffee grounds. The result? A balanced, rich, and flavorful shot.
Skip this step and you’ll face channeling. That’s when water finds weak spots in your coffee puck. It rushes through these gaps, creating sour, bitter, and disappointing espresso. Poor tamping is often why home espresso doesn’t taste as good as your favorite café’s.
This guide covers everything. You’ll learn why tamping matters, how to choose the right tool, and how to use professional techniques. We’ll make the process simple and give you confidence to pull consistently delicious shots.
Table of Contents
Why Tamping Matters
Let’s start with the basics. Why do we tamp at all? An espresso machine pushes hot water through finely-ground coffee at high pressure.
We’re talking about 9 bars or roughly 130 PSI. Your goal is to create a dense, level, and uniformly packed “puck” of coffee grounds.
This puck works like a resistor. It slows the water down, building pressure in the group head. This forces water to saturate all grounds evenly over 25-30 seconds.
Even extraction is what you’re after. A level and uniformly dense puck ensures water passes through every part of the coffee at the same rate. This pulls out the right balance of sugars for sweetness, oils for body, and acids for brightness.
Preventing channeling is the direct payoff of good tamping. If your puck has cracks, uneven spots, or less dense areas, water will exploit these weak points.
It rushes through these “channels,” over-extracting some areas and creating bitterness. Meanwhile, it under-extracts the rest, leaving sourness behind.
Consistency separates skilled baristas from beginners. A repeatable tamping routine is the foundation of shot-to-shot consistency. Control this variable, and you can better diagnose other issues with grind size, dose, or machine temperature.
A good tamp leads to:
- Better taste: Less bitterness and sourness, more sweetness and complexity
- Richer crema: A visual sign of a well-pulled shot with properly emulsified oils
- Repeatable results: Great coffee every time, not just by luck
Think of your coffee puck as a dam. A well-built, solid dam allows controlled, even water flow through its gates. A poorly constructed one with cracks and weak points breaks under pressure.
This causes chaotic, destructive flooding. Tamping is the art of building that perfect dam every single time.
Proper extraction principles are central to coffee science. Organizations like the Specialty Coffee Association (SCA) build their barista certifications around mastering these fundamental skills. Tamping is a critical part of their curriculum.
Tamper Anatomy and Types
All tampers serve the same basic function. But their design can significantly impact your workflow, consistency, and comfort. Let’s break down the main types you’ll encounter.
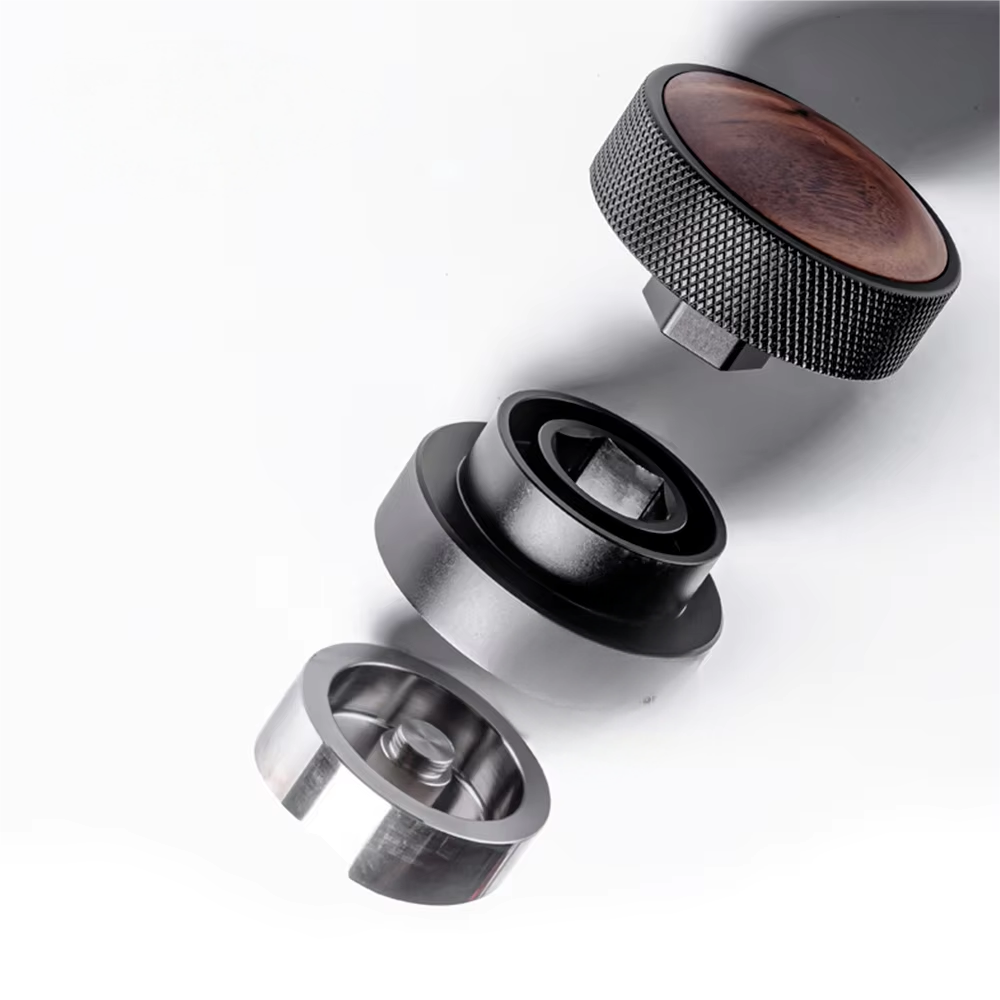
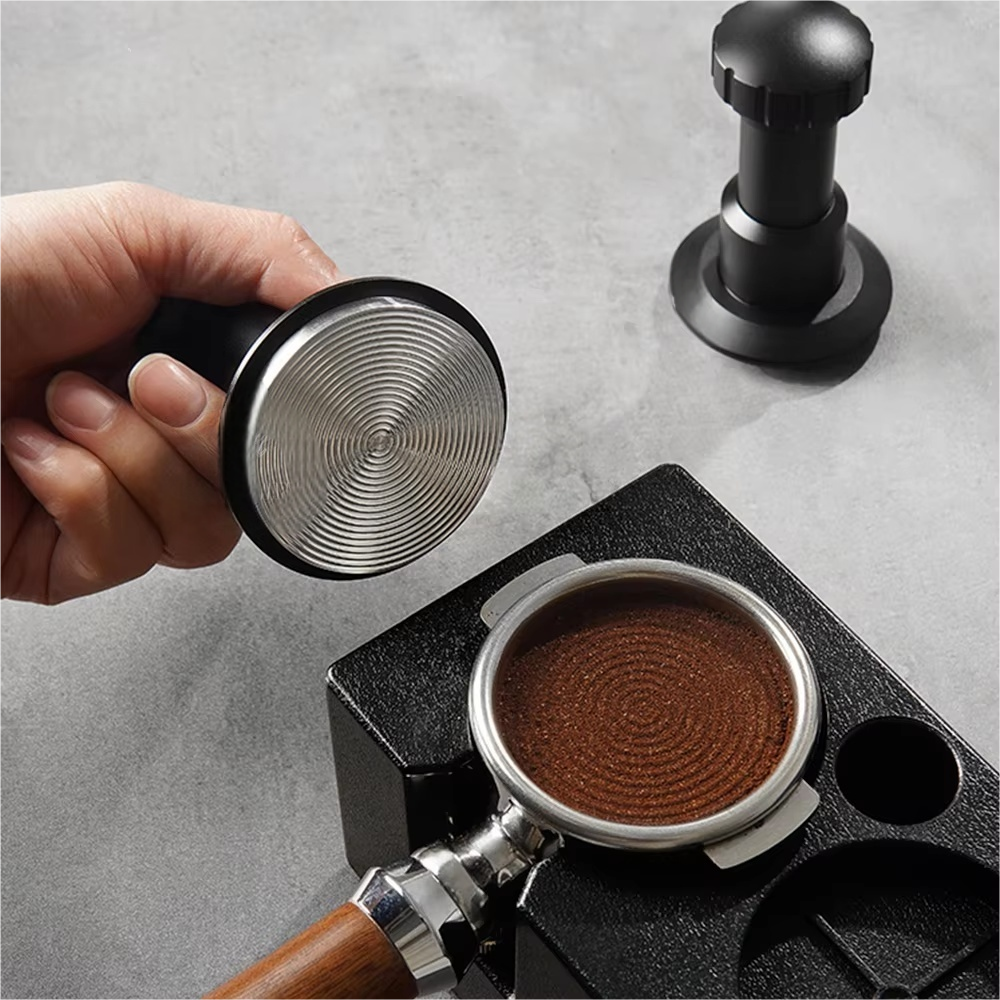
A tamper has two main parts:
- The handle: Made from wood, metal, or plastic. This affects ergonomics, weight, and looks. A comfortable handle encourages better, more consistent technique.
- The base: The business end that contacts the coffee. Its shape and material are critical. Most quality bases use stainless steel for durability, weight, and neutral properties.
Here are the most common tamper types. Each has pros and cons. We’ve organized this to help you decide which fits your needs.
Tamper Type | Description | Best For | Pros | Cons |
Flat Base | The industry standard and most common type. Features a completely flat bottom. | Everyone, from beginners to professionals who prioritize a perfectly level coffee bed. | Promotes even water flow across the entire puck surface. Easy to check for a level tamp visually. | Can be less forgiving of an uneven initial distribution of coffee grounds, potentially leaving edges slightly less compacted. |
Convex Base (American/Euro) | Has a slightly curved base. The “Euro” curve is more subtle than the “American” curve. | Baristas trying to combat side-channeling or those who prefer the feel. | The curve helps compact grounds towards the basket wall, potentially sealing the edges to reduce channeling. | Can create a slightly less dense center, risking uneven flow if not used properly. Less common in modern specialty coffee. |
Calibrated Tamper | Features a spring-loaded mechanism inside the handle that “clicks” or gives way at a preset pressure (e.g., 15, 25, or 30 lbs). | Beginners, trainees, or high-volume cafes needing absolute consistency across multiple baristas. | Removes all guesswork from tamping pressure, ensuring the same force is applied every single time. Excellent for building muscle memory. | Can be more expensive. Experienced users who have developed a consistent feel may find it unnecessary. |
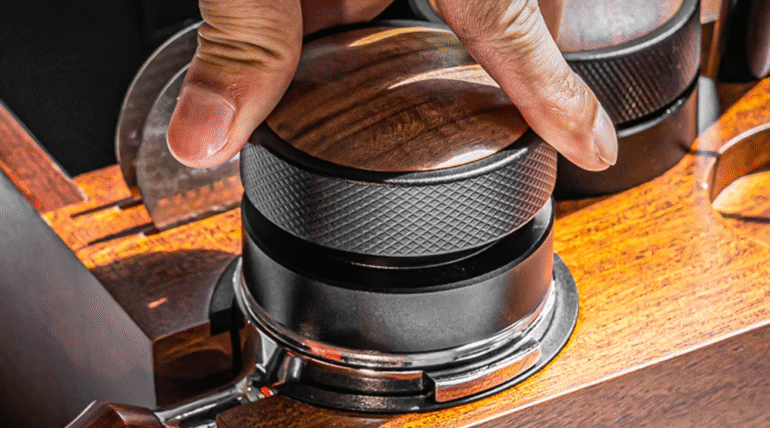
Distribution Tool/Tamper Combo | A dual-sided tool. One side is a “groomer” that levels the grounds, and the other side is a tamper. Often depth-adjustable. | Baristas seeking ultimate consistency and workflow efficiency. The “puck prep nerds.” | Dramatically improves puck prep by ensuring a perfectly level and evenly distributed bed before tamping. Virtually eliminates channeling from poor distribution. | The most expensive option. Adds a step to the workflow (distribute, then tamp), though some are all-in-one. |
Puck Rake / WDT Tool | Not a tamper, but a key partner. A tool with fine needles (like acupuncture needles) used to break up clumps before tamping. | Everyone. An essential tool for modern espresso prep, regardless of the tamper you use. | Eliminates clumps from the grinder, ensuring a fluffy and even bed for tamping. This is the single biggest upgrade for preventing channeling. | It’s an extra step in the workflow, but the benefits are so significant that it’s considered non-negotiable by most experts today. |
For deeper insight into why distribution matters so much, check out resources like Barista Hustle. They offer excellent articles on the Weiss Distribution Technique (WDT), which is what puck rakes help you achieve.
If you’re just starting, choose a simple, heavy flat base tamper. It’s excellent and affordable. It’s the standard for good reason. As you advance, consider pairing it with a WDT tool or upgrading to a calibrated or distribution model. This will further refine your process. Mastering puck prep is crucial, just as important as choosing the right espresso machine.
Guide to Tamper Sizes
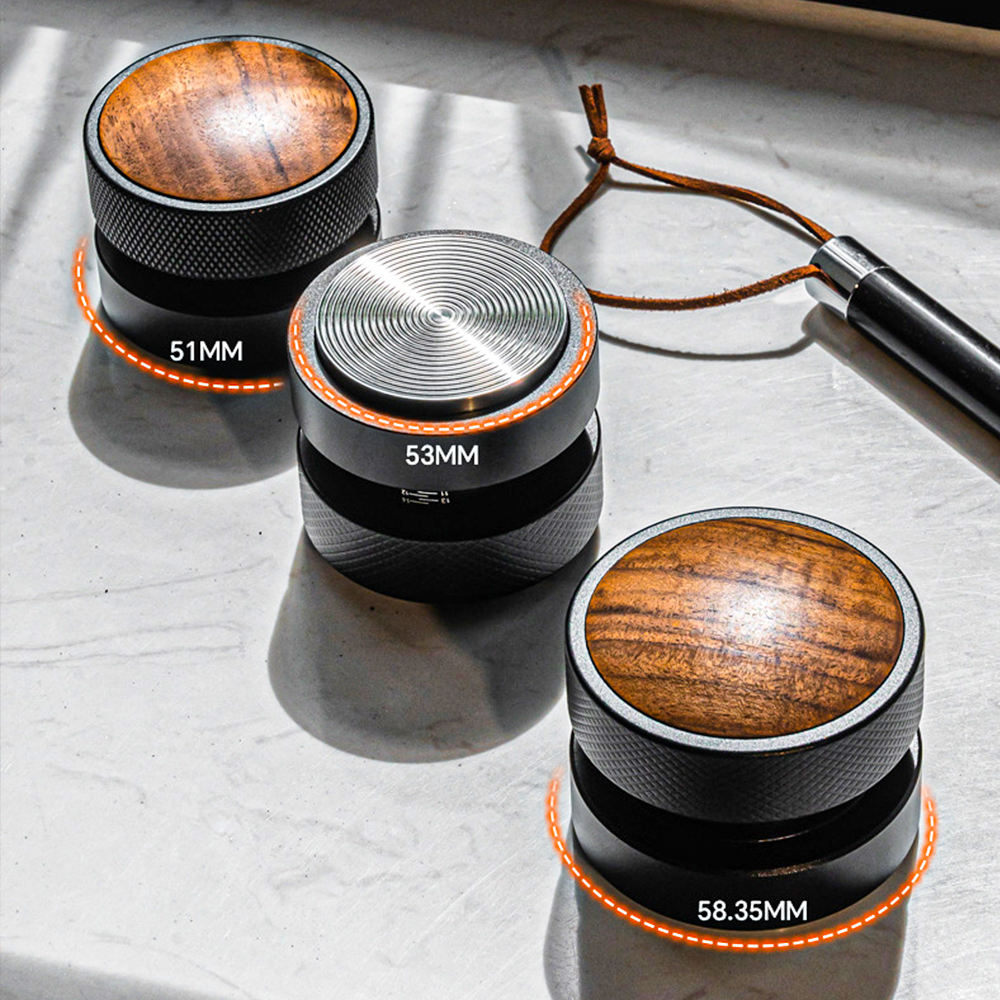
Choosing the wrong size tamper is one of the most common and frustrating beginner mistakes. A tamper that’s too small leaves a ring of un-tamped coffee around the basket’s edge. This guarantees side channeling. A tamper that’s too big simply won’t fit.
Tamper size corresponds to the inner diameter of your espresso machine’s portafilter basket. Sizes are measured in millimeters (mm). Using the wrong size is like trying to use the wrong key for a lock. It just won’t work correctly.
Common Tamper Sizes and Associated Brands:
- 58mm / 58.5mm: This is the commercial espresso standard. Most professional and prosumer machines use this size. Brands include La Marzocco, Rocket, Profitec, Lelit (pro-line), Rancilio, Gaggia (most models), Slayer, and nearly all machines with an E61 group head.
- Pro tip: Many baristas prefer a “precision” tamper of 58.5mm for a snugger fit in a 58mm basket. This minimizes the untamped edge and provides better sealing. However, ensure your basket (especially precision baskets like VST or IMS) can accommodate this slightly larger size.
- 54mm: This size is famous for many Breville/Sage home espresso machines. Models like the Barista Express, Bambino Plus, Barista Pro, and Infuser all use 54mm portafilters.
- 51mm: Often found on lower-priced consumer machines from brands like Delonghi or Smeg. Check your specific model since some brands use multiple sizes across their product lines.
- 49mm: A less common size, typically used on some older or smaller lever machines like pre-millennium La Pavoni models.
How to Find Your Correct Size:
- Check your manual: Your espresso machine’s manual is the most reliable source. Look for specifications about the portafilter or accessories. It will state the required tamper diameter.
- Measure your basket: If you don’t have the manual, use digital calipers for accurate measurement. Measure the inside diameter of your portafilter basket from edge to edge. Don’t use a ruler or tape measure. A half-millimeter difference matters greatly.
- Search online: Quick and effective. Search for “[Your Machine Model] tamper size”. The answer will almost always appear on forums like Home-Barista.com, Reddit’s r/espresso, or coffee gear retailer product pages.
Here’s a quick reference table. Always double-check for your specific model, as manufacturers can change specifications over the years.
Tamper Size | Common Espresso Machine Brands/Models |
58mm – 58.5mm | Most commercial machines, Gaggia Classic Pro, Rancilio Silvia, Lelit Bianca, Profitec Pro 700, Rocket Appartamento, most E61 Group Heads |
54mm | Breville/Sage (Barista Express, Pro, Touch, Bambino, Bambino Plus, Infuser) |
51mm | De’Longhi Dedica, Smeg, some Capresso models, some Oster models |
49mm | La Pavoni (pre-millennium models), Olympia Cremina (older models) |
Getting the size right is non-negotiable. The tamper must match the basket. Understanding your portafilter is half the battle. A snug-fitting tamper is a one-time purchase that pays dividends in taste and consistency in every shot you pull.
Machine manufacturers often provide official specifications. For example, Breville owners can check the official Breville USA parts and accessories page to confirm their model’s requirements.
A Step-by-Step Technique
Now that you have the right tool, it’s time to learn the technique. The goal is simple: create a level and uniformly compacted puck. Forget the myth about needing to be a bodybuilder. Technique beats brute force every time. A consistent, gentle approach is far more effective.
Here’s a step-by-step guide to professional tamping workflow.
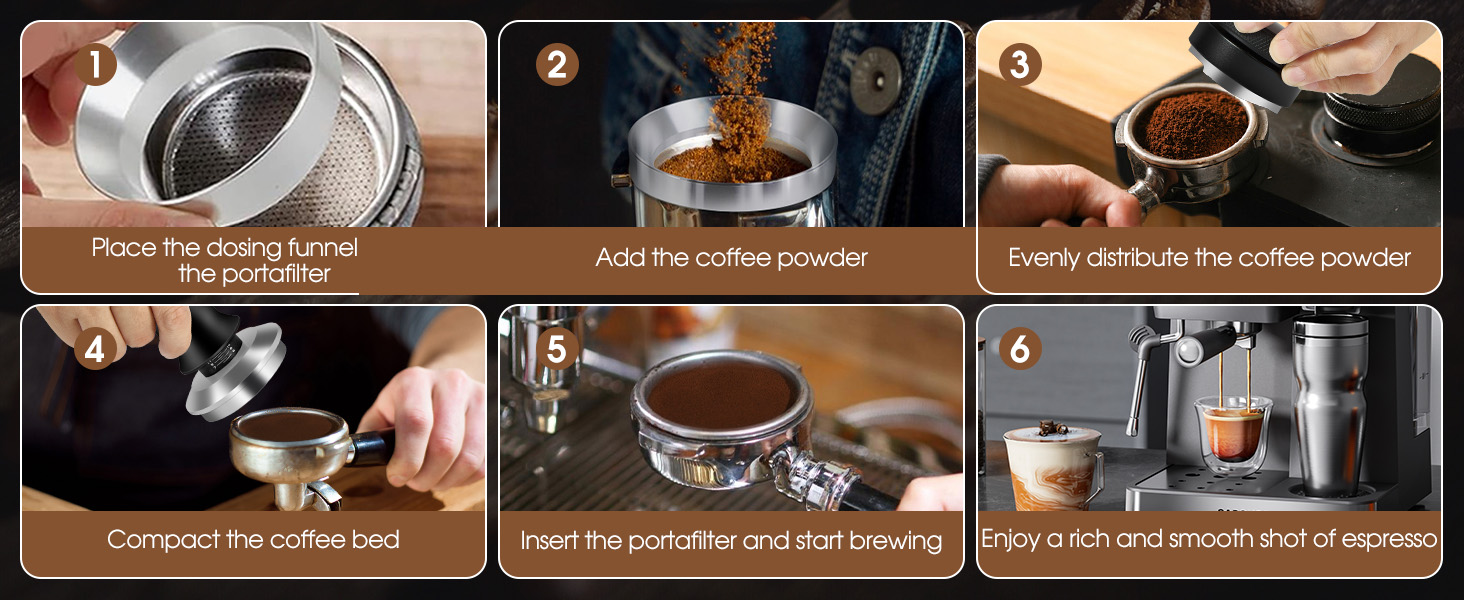
Step 1: Dose and Distribute Your Coffee
Fill your portafilter with the correct dose of ground coffee. The grounds will likely be clumpy and unevenly mounded from the grinder. This is the main cause of future problems.
Use a WDT tool (puck rake) in a circular or raking motion to break up all clumps. Work from the bottom of the basket to the top. Your goal is creating a fluffy, uniform, and evenly distributed bed of coffee. After WDT, give the portafilter a single, gentle vertical tap on the counter. This settles the grounds into a flat bed.
Step 2: The Grooming or Leveling Tamp
Place the tamper on top of the grounds. Don’t press yet. The weight of a heavy stainless steel tamper is enough for this step.
Gently spin the tamper (like turning a doorknob) about a quarter turn without applying downward force. This “grooms” the surface, creating a smooth, level starting point. It minimizes the chance of an uneven final tamp.
Step 3: Assume the Position
Stand comfortably next to your counter. Your tamping arm’s elbow should be bent at roughly 90 degrees directly over the portafilter. The portafilter should be on a sturdy, level surface. A tamping mat is ideal to protect your counter and portafilter spouts.
Keep your wrist straight, like you’re throwing a punch. This posture ensures you’re pushing straight down from your shoulder, not at an angle from your wrist.
Step 4: The Main Tamp (Pressure Application)
Apply firm, consistent pressure straight down. How much pressure? Old wisdom suggested a specific “30 pounds,” but modern coffee science shows something different. As long as you are firm and consistent, the exact number matters less than full compression.
Press until you feel the coffee puck stop compressing. You’ll feel the grounds compress and then offer significant resistance, becoming a solid mass. That’s your stopping point. Pushing harder from this point provides no benefit. It can even fracture the puck or cause it to lift and break its seal with the basket wall.
Step 5: The Polish and Clean Removal
Without changing pressure, give the tamper a very slight twist. About 1/8 to 1/4 of a turn works. This “polishes” the puck’s surface, making it smooth and less likely to have loose grounds stick to the shower screen when you brew.
Immediately release all pressure and lift the tamper straight up and out. Avoid tilting it on the way out. Crucially, don’t knock the side of the portafilter with the tamper after tamping! This is an old, disproven habit that fractures the compacted puck and guarantees channeling.
Step 6: Inspect Your Work
Look at the puck. Is it perfectly level? Is there loose coffee on the rim of the basket or on the lugs? If so, wipe it clean with your finger to ensure a good seal with the group head. You’re now ready to lock in and pull your shot.
Troubleshooting Tamping Issues
Even with the right technique, things can go wrong. The beauty of espresso is that the used coffee puck tells a story. Here’s how to diagnose and fix common tamping-related issues by looking at your spent puck after the shot is pulled. This feedback loop is the fastest way to improve.
Visual Cue in Spent Puck | Likely Problem | How to Fix It |
A small hole or “channel” visible on the surface. | Channeling. Water found a weak spot (likely a clump or low-density area) and drilled right through it during extraction, leading to a fast, sour/bitter shot. | Improve Distribution: This is almost always a distribution issue. Use a WDT tool thoroughly before tamping to break up all clumps. Ensure your initial bed of coffee is level. |
The puck is soupy, wet, and doesn’t hold its shape when knocked out. | Under-dosing or Insufficient Tamp. There wasn’t enough coffee in the basket to create proper resistance, or you didn’t press firmly enough to fully compress the grounds. | Check Your Dose: Use a scale. Ensure you’re using the right amount of coffee for your basket size (e.g., 18g for an 18g basket). Tamp Firmer: Press until the puck feels solid and fully compressed. |
The puck is cracked or fractured, especially around the edges. | Tapping the Portafilter After Tamping. This is the classic culprit. The knock breaks the seal between the puck and the basket wall, creating a superhighway for channeling. | Stop Tapping! This is a critical habit to unlearn. Once you tamp, your puck prep is done. Lock it in and brew. Also, ensure you are lifting the tamper straight up without tilting. |
The puck is visibly slanted or uneven in depth after brewing. | Uneven Tamping Pressure. You pushed down at an angle instead of perfectly straight down. This creates one side that is denser than the other, causing uneven flow. | Fix Your Posture: Keep your wrist straight and your elbow at 90 degrees directly above the portafilter. You can practice on a bathroom scale to get a feel for applying even, straight pressure. |
A dry, dusty ring of coffee around the outer edge of the otherwise wet puck. | Tamper is Too Small. The tamper isn’t reaching the edges of the basket, leaving a ring of un-compacted grounds. Water rushes through this area, causing severe channeling. | Buy the Correct Size Tamper. This is a hardware issue that technique cannot fix. A precision tamper (e.g., 58.5mm for a 58mm basket) is the best solution for complete coverage. |
Observing the spent puck is like getting a report card on your puck prep. Use this feedback to fine-tune your technique for the next shot. Many professional baristas share their puck-prep workflows online.
Watching a video from a respected source like James Hoffmann can provide excellent visual context for these techniques.
Choosing Your Next Tamper
So which tamper should you buy? The answer depends on your goals, budget, and current setup. Let’s break it down by your barista journey.
For the Absolute Beginner:
Your first and most important upgrade is moving away from the flimsy plastic tamper that likely came with your machine.
Start with a solid, heavy-weight, flat-base stainless steel tamper in the correct size. Don’t worry about calibrated or convex bases yet. Focus on a tool that fits your basket perfectly and feels good in your hand. This single purchase is a massive upgrade that provides the weight and precision needed to learn proper technique.
For the Consistency-Seeker or New Trainee:
A calibrated tamper is an excellent investment if you struggle with consistent pressure. It builds muscle memory by providing tactile feedback and removes a key variable from the equation.
This allows you to focus solely on your grind size and distribution. It’s the fastest way to achieve reliably consistent tamping pressure, especially in a household with multiple users or in a café training environment.
For the Enthusiast Seeking Perfection:
If your budget allows and you want to eliminate every possible variable, a combination distribution/tamping tool (like the OCD or a Force Tamper) is the current peak of puck-prep technology.
These tools are depth-adjustable, ensuring a perfectly level bed and a perfectly level tamp every single time. Paired with a WDT tool, they provide the most uniform and repeatable puck possible, shot after shot. This is for those who enjoy the process and want to pursue the perfect espresso.
When you’re ready to upgrade, look at reputable brands known for quality. Retailers like Whole Latte Love or Prima Coffee Equipment carry a wide range of high-quality options from brands like Motta, Reg Barber, Pullman, and Saint Anthony Industries.
Final Thoughts
The coffee tamper is more than just a tool for pressing coffee. It’s the bridge between your grinder and your espresso machine. It’s a device of control that empowers you to create balanced, delicious, and repeatable coffee. It ensures you get the most out of your carefully chosen espresso beans.
By understanding the types, choosing the right size, and mastering the technique, you’re not just buying an accessory. You’re investing in the quality of every single espresso you make.
As a professional manufacturer specializing in the research, development, and production of coffee machines, we not only offer a diverse product selection but also support OEM/ODM customization to meet the needs of diverse markets and customers. With consistent quality control, fast delivery, and innovative designs, our coffee machines are used by numerous brands and channels worldwide. Whether you're a distributor, wholesaler, or brand owner, we can provide you with reliable solutions to help you grow your business. Contact us to explore potential collaboration opportunities.

Facebook
Twitter
LinkedIn
WhatsApp
Categories: Buying/Customization Guide Product Knowledge