Pitcher Comparison · Latte Art · Cafe & OEM Guide
12oz vs 20oz Milk Pitcher: Which One Is Better?
Compare single-drink control with large and double-drink capacity before choosing 12oz, 20oz, both, or an intermediate size.
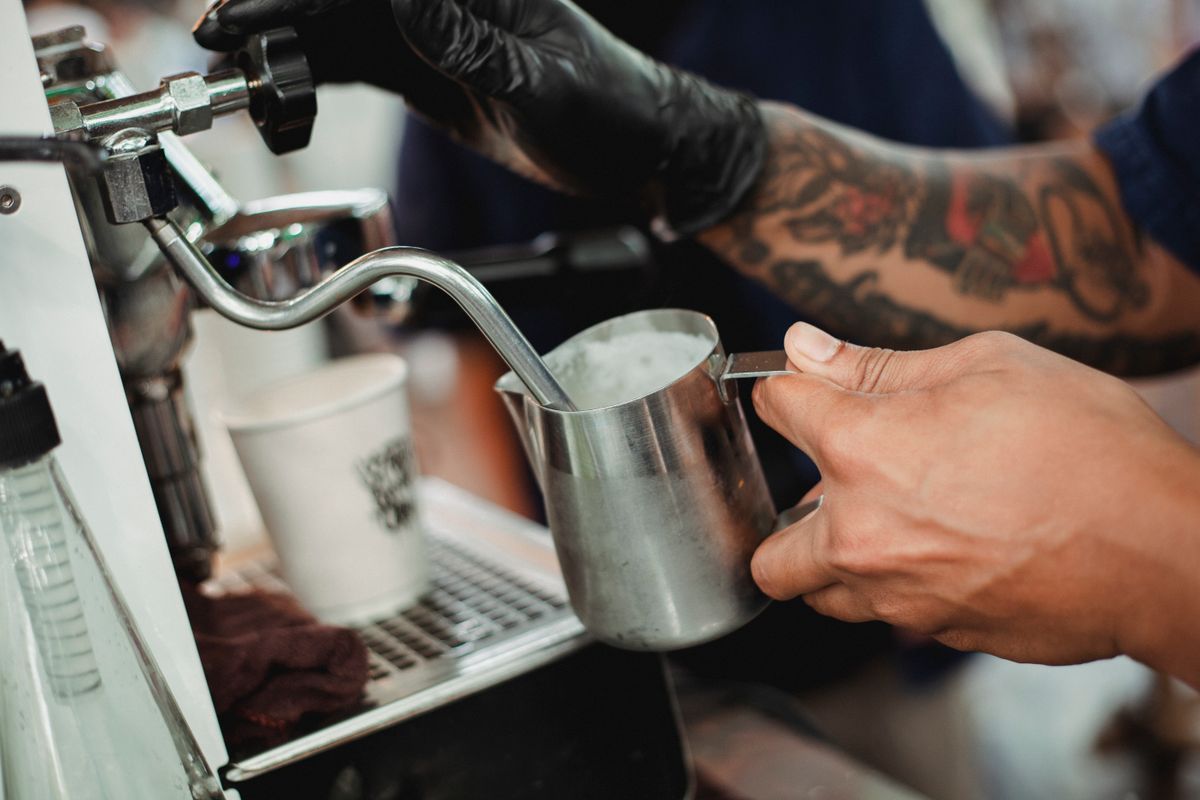
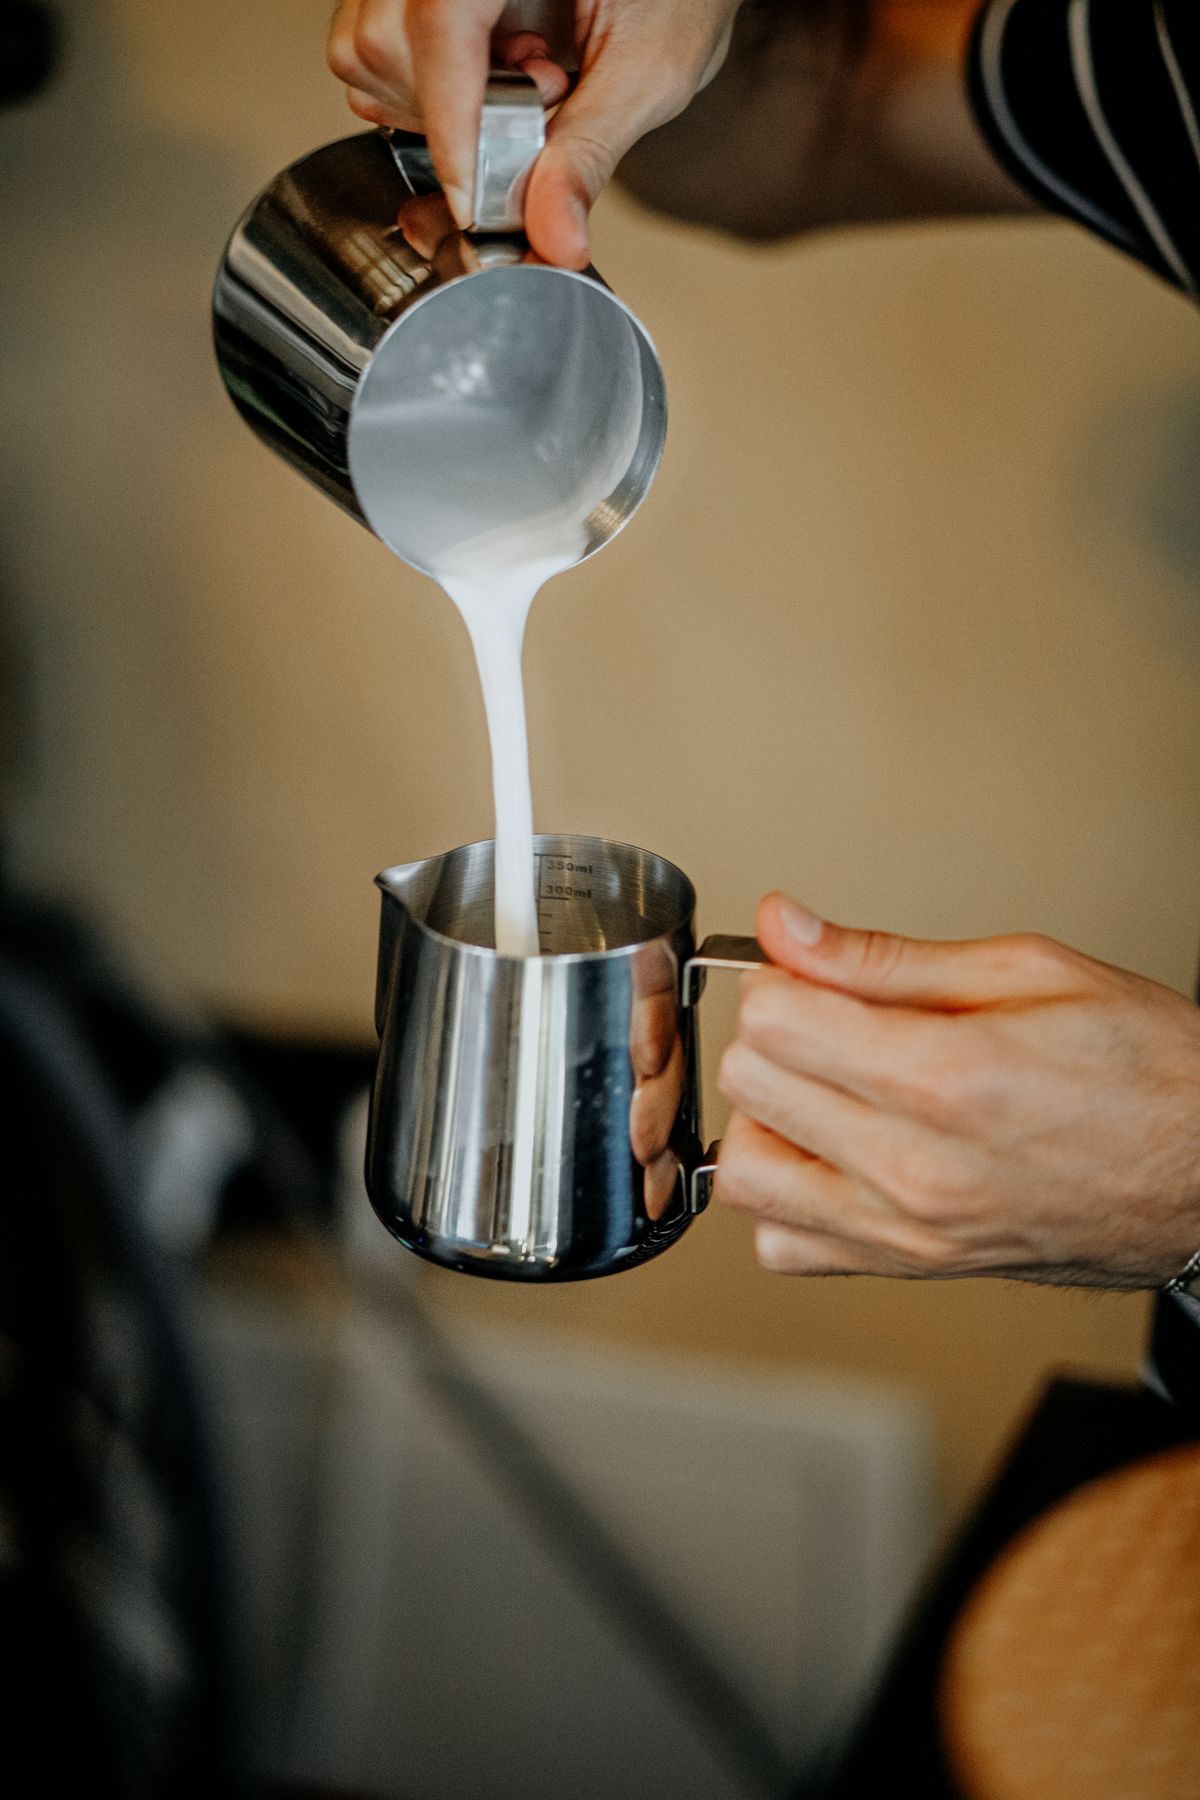
Real-use photographs, not renders. Left: Sam Lion / Pexels. Right: Masud Allahverdizade / Pexels.
The Quick Verdict
A 12oz milk pitcher is usually better for one small 5–8oz drink; a 20oz pitcher is usually better for one large 10–16oz drink or two smaller coffees. The 12oz size keeps a modest milk dose deeper, feels lighter during the pour and can reduce unused milk. The 20oz size provides more working volume and headspace for larger recipes. Neither size is universally better: choose the smallest pitcher that maintains useful steam-tip immersion, stable circulation, enough expansion room and sufficient textured milk to finish the pattern.
Do not match pitcher ounces directly to cup ounces. The cup already contains espresso, while the pitcher must hold the cold-milk dose, accommodate aeration and condensed steam, and retain enough textured milk for the finish. Measure the recipe first, then test the pitcher on the intended espresso machine and cup.
Key Takeaways
- Start with 12oz (commonly sold as 350–360ml) for one small latte, flat white, cappuccino, cortado or piccolo.
- Start with 20oz (commonly sold as 590–600ml) for one large milk drink or two small coffees.
- Nominal capacity is not a fill instruction. Body diameter, taper, top angle, markings and steam-wand geometry determine the usable working volume.
- A 20oz pitcher can be too wide for a small dose; adding extra milk only to create depth increases waste and changes the recipe.
- A 12oz pitcher can become crowded when a large dose expands; overflow is a reason to correct dose and aeration, then test the next size.
- Mixed home routines and specialty cafes usually benefit from both sizes; a 15–17oz pitcher is useful when the normal recipe consistently falls between them.
12oz vs 20oz Milk Pitcher: Side-by-Side
| Decision factor | 12oz pitcher | 20oz pitcher | What decides the winner |
|---|---|---|---|
| Common metric label | About 350–360ml | About 590–600ml | Supplier definition and actual water-capacity test |
| Typical role | One small drink | One large drink or two small drinks | Measured cold-milk recipe, not cup label alone |
| Small-dose milk depth | Usually easier to maintain | May be too shallow in a wide body | Base diameter and steam-wand geometry |
| Headspace for a large dose | Limited; overflow risk rises quickly | More expansion room | Foam target and starting volume |
| Filled handling | Lighter and easier to accelerate | Heavier, with more momentum | Grip, empty weight, dose and pouring style |
| Waste control | Strong for single small drinks | Strong when the recipe uses its working volume | Minimum useful depth versus milk actually served |
| Cafe workflow | Single-order specialist | Large/double-order workhorse | Menu mix, paired orders and station layout |
| Best buying answer | When small single drinks dominate | When large or double orders dominate | Keep both when both jobs are routine |
Fast decision: One 6–8oz drink at a time: test 12oz first. One 10–16oz drink or two 6–8oz drinks: test 20oz first. Mixed routine: keep both. If 12oz feels crowded and 20oz leaves the milk too shallow, test 15–17oz rather than forcing either extreme.
Comparing 12oz and 20oz for your product line?
Review standard capacities or send Coffmach your cup, milk-dose and customization requirements.

What Do 12oz and 20oz Actually Mean?
In U.S. volume units, one fluid ounce converts to approximately 29.57353ml. Therefore, 12 U.S. fluid ounces is about 354.9ml and 20 U.S. fluid ounces is about 591.5ml.[1] Product catalogs commonly round these families to 350ml or 360ml and 590ml or 600ml. The rounded label is useful for shopping, but it does not prove that every pitcher has the same brim volume, body dimensions or working fill.
The “oz” on a milk pitcher normally refers to fluid capacity, not the weight of the stainless vessel. A buyer should state both the familiar market label and the exact target milliliters. International quotations should also define whether the ounce label means U.S. fluid ounces or another convention.
| Label | Approximate U.S. conversion | Common market label | Important qualification |
|---|---|---|---|
| 12 fl oz | 354.9ml | 350ml or 360ml | May describe a rounded nominal or brim-capacity family |
| 20 fl oz | 591.5ml | 590ml or 600ml | May describe a rounded nominal or brim-capacity family |
| Internal line | Model-specific indicated volume | Varies by design | A dosing reference is not automatically a steaming maximum |
| Working fill | Recipe- and machine-specific | Often unpublished | Must preserve depth, circulation, headspace and pour volume |
A size label does not define the measurement method
Capacity can be measured to the rim, to the lowest point of the spout, to an engraved line or to another supplier-defined reference. Two products may both say 20oz while using different body diameters, rim heights and fill points. A dimensioned drawing and a mass-of-water test at an agreed temperature are more useful than the marketing name alone.
Rhino Coffee Gear publishes a Pro range with 360ml/12oz and 600ml/20oz models. The official pages also publish different dimensions and total capacities for the two products.[3][4] This verifies the familiar market family, but it does not turn either label into a universal working-fill standard.
Nominal Capacity Is Not Working Milk Volume
Nominal capacity answers “what size is the product sold as?” Working volume answers “how much cold milk can this specific pitcher texture effectively on this machine for this recipe?” These are different questions. The starting milk level must allow the steam tip to work near the surface during controlled air introduction, then support circulation during integration without reaching the rim.
Subminimal, for example, lists the FlowTip at 450ml total volume and approximately 180ml recommended capacity.[6] That model-specific separation demonstrates why total capacity cannot be copied as a fill instruction. Fellow offers Eddy pitchers in 12oz and 18oz and publishes internal markings that stop below each nominal size, providing another example of capacity, marks and intended working range being separate design decisions.[7]
Five volumes worth separating
Nominal volume
The rounded catalog identity, such as 12oz/350ml or 20oz/600ml.
Validated water capacity
The measured volume at an agreed fill point, method and tolerance.
Cold-milk dose
The measured milk placed in the pitcher before steaming for a defined recipe.
Textured-milk volume
The post-steaming mixture after incorporated air and condensed steam alter the volume.
Usable pour volume
The milk that reaches the cup after wall retention, residue and any intentional reserve.
Peak foam level
The highest observed level during texturing, used to verify overflow margin.
Use internal marks as recipe references
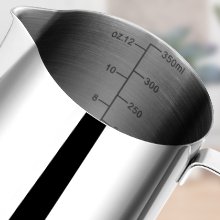
Measurement marks can improve dosing repeatability only after each mark is checked against a real cup, milk type, steam system and foam target. A line is not automatically the maximum safe steaming level.
For mark design and validation, see Coffmach’s milk frothing pitcher with measurements guide.
Official real-product image. Source: Coffmach Coffee Milk Jug.
Why Pitcher Size Changes Steaming
Pitcher size changes the geometry surrounding the milk, not only the maximum capacity. Moving the same dose from a 12oz body into a wider 20oz body usually makes the milk shallower. That can change steam-tip immersion, the angle required to keep the jet off-center, the space available for circulation and the operator’s ability to establish a stable rolling motion.
1. Milk depth and steam-tip immersion
During controlled air introduction, the tip operates close to the surface; during integration, it usually sits slightly deeper. If a single-drink dose spreads across a large 20oz base, a long wand can approach the bottom before the tip reaches a useful position. A compact 12oz body may keep the dose deeper. However, a very short or inflexible domestic wand can have the opposite fit problem, so machine clearance must be checked physically.
2. Headspace and overflow margin
A 12oz pitcher has less space above a large starting dose. That improves depth for small recipes but becomes a constraint when the recipe needs more milk or more aeration. A 20oz pitcher provides more headspace for a large latte or two drinks. The correct margin depends on foam style, milk formulation, air intake, steam condensation and technique; “always fill halfway” is only a rough starting heuristic.
3. Body diameter, taper and circulation
The visible whirlpool is produced by steam-jet direction, wand angle, tip depth, milk volume, taper and wall shape. Capacity does not fully define that system. A narrow 20oz body can keep a dose deeper than a wide 17oz competition pitcher, while two 12oz models can behave differently because their shoulders and bottom radii differ.
Decent Espresso’s latte-art guide discusses 12oz for a single cup and 20oz for two cups, including why a single portion may rotate less effectively in a larger-diameter pitcher.[5] Treat this as practical guidance for the illustrated equipment, then verify the actual pitcher-and-machine pair.
4. Steam power and available texturing time
A 20oz pitcher is often paired with more milk, so the steam system must deliver enough energy and momentum for the batch. A commercial multi-hole tip may texture it quickly, while a small thermoblock or single-hole wand may take much longer. More time is not automatically better or worse, but it changes when air must be introduced and how long the operator has before the endpoint.
Milk composition and temperature remain major variables. Peer-reviewed research on espresso-machine steam frothing reports that milk processing, composition and heating conditions affect viscosity, bubble distribution, texture and foam stability.[9] Pitcher size supports the process; it does not create microfoam independently.
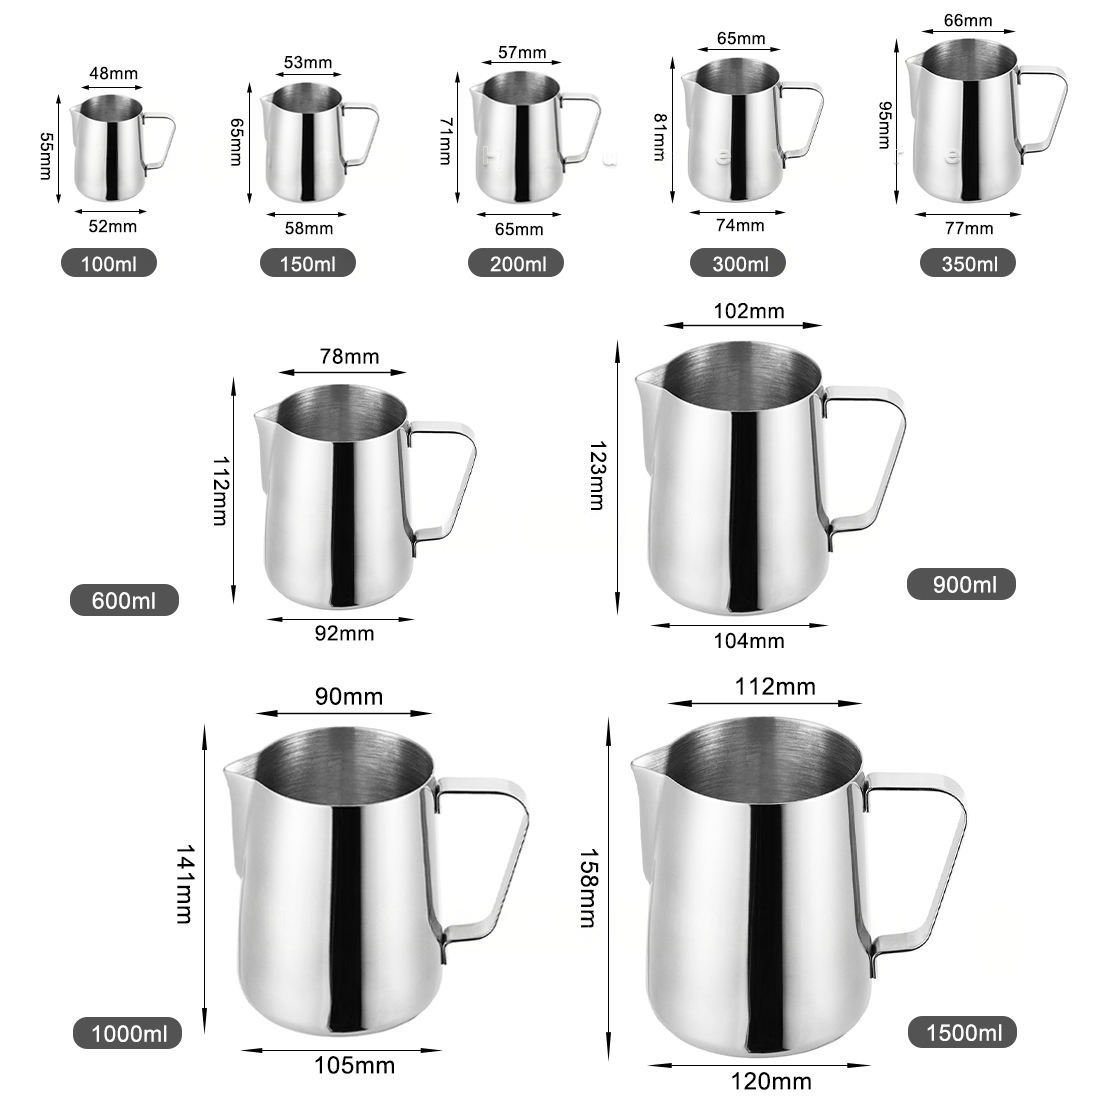
Why Pitcher Size Changes Pouring
Steaming requires depth, headspace and circulation. Pouring requires predictable balance, a clean release and enough textured milk to complete the design. A pitcher can perform well during steaming but feel wrong at the cup because the filled mass, grip position, top angle or spout geometry does not suit the pattern.
A 12oz pitcher favors light, close control
With a correct single-drink dose, a 12oz pitcher is lighter and easier to accelerate, stop and reposition. The spout can approach the crema with less mass in the hand. This can help beginners read the relationship among pour height, flow rate and cup tilt. The limitation is reserve: a dose that is too small may run out before the cut, while an overfilled pitcher may require an awkward approach angle.
A 20oz pitcher favors volume and momentum
A 20oz pitcher carries enough milk for a large cup or two drinks and can provide a smoother-feeling stream when used within its working range. The trade-off is inertia. More filled mass can make rapid corrections harder and can encourage the operator to pour from too high. For one small cup, unused milk may remain simply because the body needed extra depth.
Spout geometry is a separate variable
Round, pointed and hybrid spouts can appear on either size. A larger pitcher is not automatically broad-flow, and a smaller pitcher is not automatically precise. When isolating capacity, compare matched models with the same spout family, handle, finish and material. Otherwise the test changes several variables at once.

When a 12oz Milk Pitcher Is Better
Choose 12oz when the normal job is one small milk drink and the measured dose maintains sufficient depth without crowding the rim. Common applications include a 5–8oz flat white, cappuccino, cortado, piccolo or small latte. It also works well for training when the instructor wants a repeatable single-drink recipe and clear handling feedback.
Advantages
- Useful depth for modest milk doses.
- Lower filled mass near the cup.
- Less temptation to steam excess milk.
- Fast response and clear technique feedback.
- Compact footprint on a home or cafe bar.
Limitations
- Less headspace for large or foam-heavy recipes.
- Quick heating window on a powerful commercial wand.
- Limited reserve for large cups or elaborate patterns.
- May conflict with a long wand or tight drip-tray clearance.
- Inefficient when two drinks must be produced together.
When a 20oz Milk Pitcher Is Better
Choose 20oz when the routine includes one large latte, a 10–16oz takeaway drink or two small coffees. It provides greater working volume and headspace, and it can reduce service time when paired orders use the same milk. It is a common cafe workhorse, but that does not mean it is ideal for every single drink.
Advantages
- More room for larger cold-milk doses.
- Better suited to one large or two small drinks.
- More reserve for a long pour or second cup.
- Useful headspace for recipes requiring greater expansion.
- Can consolidate compatible paired orders.
Limitations
- A small dose may become shallow in a wide body.
- Greater filled mass and inertia during detailed art.
- Can increase waste if extra milk is added only for depth.
- Needs sufficient steam power for larger batches.
- Second-cup foam balance can change as milk separates.
12oz vs 20oz by Drink and Workflow
| Task | 12oz | 20oz | Likely starting choice | Validation question |
|---|---|---|---|---|
| One 4–6oz cortado or piccolo | Strong fit | Often oversized | 12oz | Does the steam tip fit the lower dose? |
| One 6–8oz flat white or cappuccino | Strong fit | Possible but may waste milk | 12oz | Is enough milk left to finish the pattern? |
| One 8–10oz latte | May be near its limit | May be larger than needed | Test both or 15–17oz | Which gives depth and headspace without excess? |
| One 10–16oz latte | Usually too crowded | Strong fit | 20oz | Can the machine texture the full batch efficiently? |
| Two 6–8oz drinks | Requires separate batches | Common use | 20oz | Does the second cup retain the intended texture? |
| Detailed single-cup training | Light and responsive | Useful only for large recipes | Recipe-dependent | Can the learner repeat dose, texture and pour? |
| Mixed cafe menu | Small-order specialist | Large/double-order specialist | Keep both | Does stock match the real order mix? |
| Plant-milk workflow | Good for small recipes | Good for large recipes | Test formulation | How much does the specific beverage expand and drain? |
If You Can Buy Only One
Choose 12oz as your only pitcher when you make one small drink at a time, use a modest milk dose, value low waste and do not need to batch compatible orders. Choose 20oz when your normal drink is large, paired orders are frequent, or a 12oz body consistently lacks headspace.
Choose an intermediate 15–17oz pitcher when a 12oz model feels crowded but a 20oz body leaves the milk shallow or feels heavy. Slow Pour Supply’s WPM range, for example, presents several adjacent capacities linked to different cup ranges.[8] This is model-family guidance, not a universal standard, but it illustrates why the market includes useful sizes between the two familiar labels.
Home, Cafe and Training Recommendations
Home barista: buy the size that matches the drink made most often. A single 6–8oz daily latte usually points to 12oz. A large mug or two-person routine usually points to 20oz. Owning both is useful only if both recipes are genuinely part of the routine.
Specialty cafe: stock both roles instead of forcing one universal pitcher. Use 12oz or a nearby compact size for single small orders and 20oz for large or paired drinks. Set recipe-specific cold-milk marks and record waste by menu item. Coffmach’s commercial milk jug guide covers stocking, durability and workflow in more detail.
Training school: standardize cup, espresso yield, milk, starting temperature, steam setting, endpoint and pattern before comparing capacities. A matched 12oz and 20oz set helps students feel how depth and filled mass change, but instructor scoring must separate size effects from basic texture errors.
What About Oat, Soy and Other Plant Milks?
Do not assume the dairy fill line works for every plant beverage. Protein, fat, stabilizers, viscosity, foamability, expansion and drainage vary by formulation. The same pitcher may behave differently even when cup size is unchanged.
Start with the dairy-tested size, then repeat the same test with the actual barista formulation. If the beverage expands less, a reduced fill may become too shallow. If it creates more foam volume, headspace may become the constraint. Change pitcher size only after the test identifies depth or headspace as the problem.
How to Test 12oz and 20oz Side by Side
- Measure the cup and recipe. Record actual beverage capacity, espresso yield, cold-milk dose and intended foam style.
- Use matched pitcher families. Keep material, wall, spout, handle and finish as similar as possible so capacity is the main changing variable.
- Check wand fit before steaming. With the machine off and the measured dose in the pitcher, confirm the tip can reach the intended position without hitting the base, rim, handle or drip tray.
- Standardize the steaming run. Use the same milk, starting temperature, operator, steam setting and endpoint. Record peak level, time, circulation and overflow risk.
- Run the same pour. Pour a simple heart and one line-dependent pattern into the same cup. Score approach angle, filled weight, flow response and remaining milk.
- Measure waste and repeatability. Weigh unused milk, repeat several cycles and choose from the sequence rather than one successful pour.
| Score category | What to observe | Why it matters | Record format |
|---|---|---|---|
| Wand fit | Tip depth, base clearance, rim and handle interference | Determines whether the intended position is physically possible | Pass/fail plus photo |
| Circulation | Time to stable roll and visible dead zones | Shows dose-to-body compatibility | Seconds plus 1–5 score |
| Headspace | Peak level and distance below rim | Identifies overflow margin | Millimeters or marked photo |
| Texture | Gloss, visible bubbles, integration and drainage | Separates usable microfoam from volume alone | Blind 1–5 score |
| Pour control | Start angle, spout clearance, flow response and cut | Captures handling at the cup | 1–5 score per pattern |
| Yield | Milk delivered and milk remaining | Shows whether the size creates shortage or excess | Grams before/after |
| Repeatability | Variation across repeated runs and operators | More important than one highlight result | Average and range |
Troubleshooting Size-Related Problems
| Symptom | Likely size or geometry cause | How to confirm | Corrective action |
|---|---|---|---|
| Milk overflows in 12oz | Dose too high, too much air or insufficient working volume | Measure dose and peak level; repeat in matched 20oz | Correct dose/aeration, then move up if still crowded |
| Steam tip cannot stay immersed in 20oz | Small dose too shallow for the body width | Check depth before steaming with the exact dose | Use 12oz, a narrower body or a compatible intermediate size |
| No stable roll | Dose, taper and steam-jet direction are mismatched | Compare wand positions and matched capacities | Adjust position; change geometry if needed |
| 12oz heats before texture develops | Small batch and high steam power reduce the control window | Time identical runs and review air-introduction timing | Refine timing or test a practical larger pair |
| 20oz feels heavy and slow | Pitcher or batch is larger than the cup needs | Compare filled mass and the same pattern | Move down a size without losing steaming depth |
| Pitcher empties before the cut | Dose too low, high retention or steep approach angle | Weigh milk before and after pouring | Refine dose or select better-releasing geometry |
| Second cup looks thin or foamy | Separation during the first pour | Score both cups at a fixed delay | Recombine promptly or steam separate batches |
| Same label behaves differently | Different brim volume, width, taper, marks or spout | Measure drawings and water capacity | Qualify by model and golden sample, not label alone |
Common Buying Mistakes
- Matching pitcher ounces directly to cup ounces. Espresso already occupies cup volume, while the pitcher needs depth and expansion space.
- Treating nominal capacity as the steaming fill. Brim volume leaves no safe headspace.
- Buying 20oz only to prevent overflow. Correct dose and air intake first; then increase working volume when necessary.
- Adding milk only to make a wide pitcher work. This changes the recipe and hides a geometry mismatch.
- Comparing unrelated spout and body families. Use matched designs when the goal is to isolate size.
- Expecting one pitcher to cover every task. A universal size usually creates waste on small drinks or capacity limits on large ones.
Before blaming size, confirm core technique with Coffmach’s milk frothing pitcher use guide. Size comparisons become more meaningful after aeration and rolling technique are reasonably consistent.
Cafe Stocking and Workflow
A practical cafe station normally benefits from separate functional roles. Use compact pitchers for single small orders and 20oz pitchers for large or compatible double orders. Stock quantity should reflect menu mix, cleaning cycles, milk separation policies and the number of active baristas—not a generic ratio copied from another cafe.
Record cold-milk dose and waste for important menu items. If most 20oz runs require extra milk only to reach depth, the body may be too wide or the task may belong to 12oz or an intermediate size. If 12oz regularly approaches the rim, review dosing and foam target before qualifying a larger model.
For two-drink workflow details, see Coffmach’s milk jug for two coffees guide. It is useful to test first-cup and second-cup texture separately rather than judging only total capacity.
OEM and Private-Label Specification
“12oz pitcher” and “20oz pitcher” are not complete procurement specifications. A supplier can meet the nominal label while delivering a body that is too wide for the target dose, a top angle that forces excessive tilt or internal marks that operators misread. Convert each label into measurable geometry, material requirements and a functional test.
Build each size around its actual job
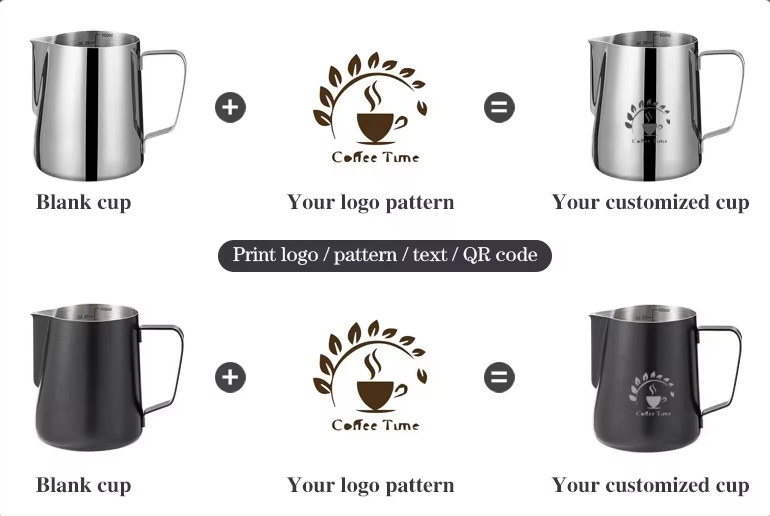
Coffmach currently presents ready-stock capacities from 100ml to 1500ml and customization for size, material, finish, color, measurement marks, logos and packaging.[2] Confirm project-specific availability, tolerances, documentation, quantity and schedule in the quotation.
Request a matched 12oz and 20oz family when capacity is the intended variable. Do not approve the 20oz by simply scaling the 12oz drawing; taper, balance, spout approach and handle clearance may need separate qualification.
Official real-product image. Source: Coffmach Coffee Milk Jug.
| Specification item | What to define | Suggested verification | Buyer implication |
|---|---|---|---|
| Capacity | Reference fill point, mL target, tolerance and water condition | Calibrated mass-of-water method | Prevents ambiguous 12oz/20oz labels |
| Working fill | Recipe-specific cold-milk marks or ranges | Controlled steaming on target machine | Confirms depth and headspace |
| Body geometry | Height, top/bottom diameters, taper, base radius and top angle | Drawing inspection and fixtures | Controls circulation and wand fit |
| Spout | Projection, opening, lip radius, centerline and finish | Dimensional check plus water/milk pour | Protects flow and line placement |
| Handle or grip | Position, clearance, balance, welds and heat interface | Filled user trial and load check | Controls comfort and repeatability |
| Material and wall | Grade, nominal sheet and finished-thickness locations | Traceable documents and thickness map | Separates construction from marketing language |
| Measurement marks | Units, positions, tolerance, contrast and durability | Volume check and cleaning cycles | Supports dosing without false fill guidance |
| Functional test | Machine, milk, dose, cup, endpoint, pattern and pass score | Repeated coded test against a golden sample | Confirms actual use in both sizes |
| Packaging | Size identity, barcode, insert, protection and master carton | Pack-out and transit check | Prevents size mix-ups and deformation |
RFQ checklist for matched 12oz and 20oz pitchers
- State both market labels and exact target milliliters.
- Define the capacity measurement method, reference fill point and tolerance.
- Attach separate dimensioned drawings; do not approve only a scaled copy.
- List target cold-milk doses, cups, milk formulations, espresso machines and steam tips.
- Specify spout profile, top angle, handle or handleless grip, finish and logo process.
- Define internal marks by tested recipe and required unit system.
- Request unbranded dimensional samples before decorated packaging samples.
- Use coded side-by-side trials and a golden sample for each capacity.
- Add inspection sampling, defect definitions, packaging checks and change control.
Ready to qualify 12oz and 20oz samples?
Send the cup, cold-milk dose, machine, spout, markings, finish, logo and packaging brief for a matched quotation.
Frequently Asked Questions
Is a 12oz or 20oz milk pitcher better for latte art?
A 12oz pitcher is usually better for one small 5–8oz drink because it keeps a modest dose deeper and feels lighter. A 20oz pitcher is usually better for one large drink or two smaller coffees because it provides more working volume and headspace. Spout geometry, body width, wand fit and recipe can reverse the preference, so test the actual system.
Can I use a 20oz pitcher for one latte?
Yes, if the latte is large enough or the pitcher body keeps the measured milk dose at a useful depth. For a small 6oz drink, a wide 20oz body may leave the milk shallow and encourage waste. Check steam-tip immersion, circulation, pour reserve and leftover milk rather than assuming the larger size is automatically easier.
What cup size works with a 12oz milk pitcher?
A 12oz pitcher commonly suits one 5–8oz milk drink, but cup size alone is not enough. The cup contains espresso, while the pitcher starts with cold milk and must leave room for aeration and steam condensation. Measure the recipe and confirm that the final level stays below the rim while enough milk remains to finish the pour.
Is a 20oz pitcher enough for two coffees?
Often yes for two small 6–8oz drinks when the combined milk dose fits the specific 20oz body and the espresso machine can texture it efficiently. Two large lattes or foam-heavy cappuccinos may need separate batches. Compare the first and second pours for separation, temperature and foam balance.
How much milk should go in a 12oz pitcher?
There is no universal amount. Use the cold-milk dose required by the cup, espresso and foam style, then verify steam-tip depth and headspace in the specific 12oz model. An internal line is useful only when it is tied to a tested recipe. Do not fill to the brim or copy another model’s working ratio.
How much milk should go in a 20oz pitcher?
Use the measured amount required for the intended large drink or combined two-drink order, not a fixed percentage of 20oz. Confirm the starting level, peak foam level, circulation, final yield and residue. If a small recipe needs extra milk merely to reach useful depth, switch to a 12oz or narrower intermediate pitcher.
Does a bigger pitcher make better microfoam?
No. A bigger pitcher helps only when it provides the correct milk depth, circulation space and headroom for the intended dose. Microfoam also depends on milk composition, starting temperature, steam pressure, air incorporation, tip position and endpoint. An oversized body with shallow milk can make integration harder.
Do I need both a 12oz and a 20oz pitcher?
You need both only if both jobs are routine. The 12oz pitcher handles single small drinks efficiently; the 20oz pitcher handles large or double orders. A home user with one fixed recipe may need only one. A cafe or mixed household often benefits from both after each size is tested with its assigned task.
Should beginners start with 12oz or 20oz?
Beginners should start with the size that matches their daily recipe. For one small drink, 12oz generally gives clearer feedback and less excess mass. For a large latte, 20oz provides the necessary working volume. Do not add milk solely to make a large pitcher work; standardize cup, dose, endpoint and technique first.
Are 350ml and 360ml both considered 12oz?
They are commonly sold within the 12oz market family, although 12 U.S. fluid ounces converts to about 354.9ml. The difference can reflect rounding or the supplier’s measurement method. Buyers should specify exact milliliters, reference fill point and tolerance instead of treating every 12oz claim as dimensionally identical.
Technical Sources
- NIST Guide to the SI, Appendix B.8 — U.S. fluid-ounce-to-milliliter conversion factor used to distinguish exact conversions from rounded market labels.
- Coffmach: Coffee Milk Jug — current product imagery and supplier-listed size, material, finish, marking, logo and packaging customization options.
- Rhino Coffee Gear: Pro Milk Pitcher 360ml/12oz — official model capacity, dimensions, material and internal-mark specifications.
- Rhino Coffee Gear: Pro Milk Pitcher 600ml/20oz — official larger-model capacity, dimensions, material and internal-mark specifications.
- Decent Espresso: Everybody Latte Arts — first-party practical discussion of pitcher size, a single serving in a 20oz body, milk depth and circulation.
- Subminimal: FlowTip Milk Jug — official model-specific example separating approximately 180ml recommended capacity from 450ml total volume.
- Fellow: Eddy Steaming Pitcher — official example of multiple nominal sizes, internal-mark ranges, stainless material, tapered body and spout design.
- Slow Pour Supply: WPM Pitcher Collection — official seller’s model-family mapping of several pitcher capacities to cup-size ranges, including intermediate choices.
- International Dairy Journal: Effect of Steam Frothing on Milk Microfoam — peer-reviewed evidence on milk composition, processing, texture, viscosity, bubbles and stability under steam frothing.